Teacher gifts

21 12 2012

So much for posting more frequently! I don’t know quite why, but this year has just been crazy. That purse I was going to make in October, yeah, that hasn’t happened. I did manage to get fabric for it though, in the form of a pair of cargo pants and a linen dress, so hopefully I can start on that soon. I also knit a cowl for BB, but I don’t have a picture yet… So the only thing I’ve accomplished that I can share is this year’s teacher gifts:

20121221-105843.jpg

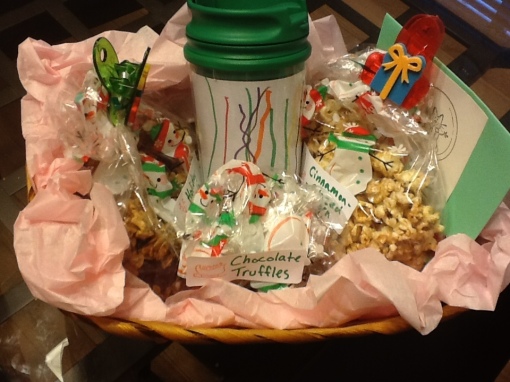
We live right by a Dollar Tree these days, and I found baskets and decorate-it-yourself mugs there, plus some cellophane bags. I made granola similar to this, but with pecans, orange zest, and craisins, to make it a “holiday granola”. Then I made cinnamon-glazed popcorn, just as written, and chocolate truffles from a cookbook. They were simple but messy…so, so, so messy. In the end, the kids didn’t help at all because they are both sick, which is a bummer.

Well, off to round up library books, package more bags of popcorn, do laundry…and pay more attention to LB. 🙂 Maybe the new year will bring a little more time to myself!


A Halloween science lesson: parts of the body

6 10 2012

Let me try to summarize our educational melodrama of the past few months before I get into the science lesson we did today… So when we realized we’d be moving to Seattle for a year I decided we would homeschool BB for his kindergarten year. Everyone was more or less on board with this plan. We had good reasons: public schools here are mixed, with some being very good and some being pretty bad. Where we were looking to rent, it was pretty bad. Private school is too expensive, and hard to get into, as a latecomer. But we ended up renting in a totally different part of the city than anticipated, and our local school seemed pretty OK. (By that I mean a 5/10 on greatschools.com. Pretty average.). I was still set to homeschool. It was gonna be awesome! Exploring the museums, parks, and beautiful surroundings of the puget sound area. Learning about volcanoes and killer whales. But…as the summer came to a close, BB started asking about where he was going to kindergarten and when did it start, and it occurred to me that he was either not understanding my awesome plan or not on board with it. So I hastily enrolled him in SPS. And crossed my fingers it would be ok.

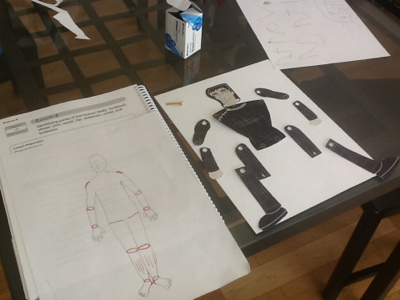
Here, they have full day K, but you have to pay for it (crazy, right?). So school started, he was excited, then less excited, then nervous, and on day 4 a sobbing mess of a child, begging me not to leave him there. Hmmmmm. I made a deal that I’d come get him at lunchtime. He was ok with that. Since then, we have dropped to half day officially, which saves us quite a bit of $$$ and seems to be a better amount of time for him to be at school. And now I have him at home in the afternoons, and while LB naps, we work on the lessons he is missing by not going full day. I purchased curricula for handwriting, math, and science, the last one being Nancy Larson Science. The reviews were great, and BB was excited about it but his enthusiasm has faded a little. We are just on lesson 5 so I don’t want to review the whole thing, but I’ll say the early lessons were too easy for him. There were 3 lessons about naming the parts of the body, easy names, like hand and head, etc. I was supposed to draw a body and highlight the parts we were naming. Neither one of us wanted a third day of this, so for kicks I printed out Frankenstein’s monster and we assembled him as we named his joints and other parts. This little monster shows joints well, because they really move, and you can pose him in different ways. Then because LB was with us (no nap today!) we all played the scripted game of Simon says. It was a LOT more fun with 2 kids!

Here is where I found the monster printable. They have a bunch and it’s a fun activity in and of itself, plus a fun way to go over shoulders, elbows, etc., since the joints are articulated using brass brads. Looks more fun than the body drawing, eh?

20121005-224657.jpg
LB wanted me to take a picture of him doing his “work” too.

20121005-225049.jpg

At this point, I like the science curriculum although I see it as a little too basic. As a former high school science teacher, I wanted to guard against my own tendency to speak over a 5 year old’s head. I think this will work out for us, with me adding a little more of a challenge, or adapting it to be more fun somehow. For now, this is our life; a little less crafting for me (ok, a lot less crafting, my machines are still in boxes!) and more educational, homeschoolish type crafts. My goal for October is to make a new purse, though,because my dream purse is in tatters!


Long time no see — an update

3 10 2012

Wow, it’s been a long time! You know, I follow several blogs and I’m always amazed to read things like, “Guess what, I just had a baby! Now I will only be posting 3 times a week instead of 5” or “Sorry this is a day late! We just moved cross country and I am posting from my phone.”. Well, this summer we moved cross country. It wasn’t the kind of thing that set me back a day, it was the kind of thing that turned our whole world upside down. We’ve gone from the suburbs of upstate NY to the city of Seattle, from a house with a yard to a townhouse with no yard, just a view of an alley and an adult video store. Classy! BB has started kindergarten, which has been a HUGE adjustment for us all. More on that another day! LB is going to a great little Spanish immersion preschool. He came home yesterday and told me, “Hoy es Martes!”. I was so proud! So, this is all to say that we are finally settling into a routine and hitting our stride in a new place.

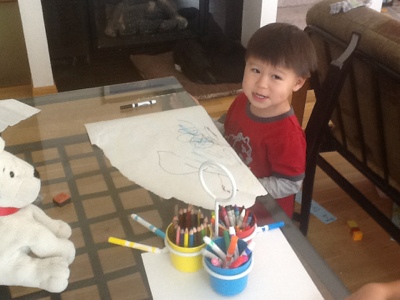
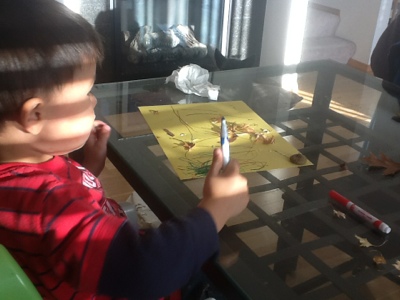
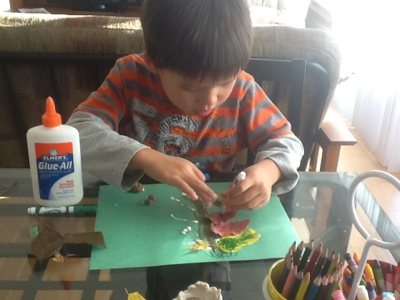
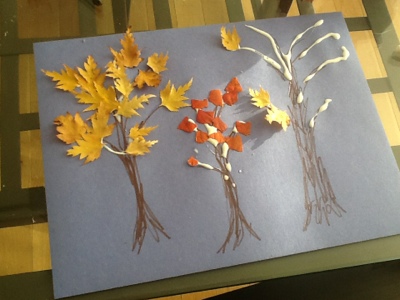
Fall has been beautiful, and today I finally kind of got my act together, thanks to a great morning at MOPS, which I haven’t done before but really enjoyed, and found very encouraging. They talked about the five love languages for kids and it really reminded me that the kids both love doing crafts, which I have slacked off doing since we moved here. So today when we went walking to BB’s martial arts class, we gathered leaves, acorns and chestnuts. We made a little fall foliage collage… No directions from me beyond drawing a tree trunk and gluing stuff on. They love gluing stuff!

20121003-180710.jpg

20121003-180756.jpg

20121003-180816.jpg

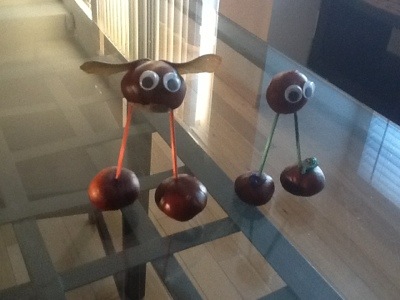
The kids each did their own thing! Then we made some cute little chestnut guys. The chestnuts were soft enough that I could just shove in toothpicks. We used fast grab tacky craft glue for this project.

20121003-180938.jpg

Cute, aren’t they? Well, I’m going to try posting this before it gets too long. I just realized I could do this on my iPad (so please excuse odd punctuation, it has it’s own ideas sometimes), which is super convenient if it works. You can expect more posts if this works out!


My top was featured!

25 04 2012

Big excitement in my little world… in the midst of cleaning, cleaning, cleaning, getting out of the house for showings, general depression that all these people who come to see the house don’t seem to want to buy it, etc., I get an email saying

EEEEeeeeeeEEEEE!  Way to make my day, my week, my year, Rae!  Looking through the pool of tops there are so, so, many that are so, so beautiful that I never dreamed that I had a chance (although I certainly hoped it).  Please take a moment to take a look at this week’s Top of the Tops to see the massive talent of this group of garment makers.  (Clicking on the image above should take you to the poll.)  I loved the wavy pintucks shirt from the moment I saw it, the bow top made from the Anna Maria Horner fabric that I love, and so, so many more.  I can’t believe that I am in among these!  As much as I love both linen tops that came out of the past week, it was the Happy dots that was featured, and honestly I think it is my favorite too.  It’s so bright and cheery, and so light and comfortable.  The winner gets a gift certificate for fabric (!!!) so of course it would be awesome to win!  Please check it out and vote for your favorite (only once, mom!)!


Happy Dots – Skirt refashion #2

22 04 2012

Well, I did it!  I finished spring top #3 before the deadline of 8 p.m. tonight. 

IMG_5619

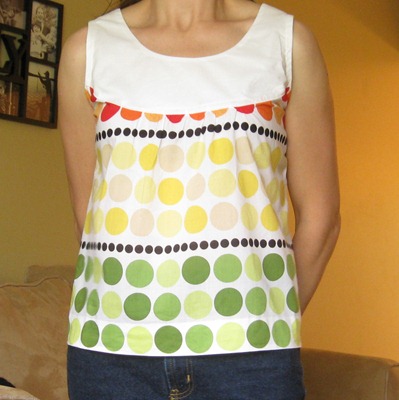
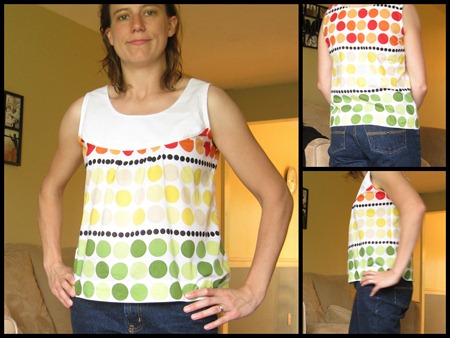
Of course, today is gray and rainy, so the pictures are not the best, but what really matters is making a top that I think is super cute, and pulling off some pattern alterations that make this latest Sorbetto completely different from my first two Sorbettos. Like I mentioned last time, I thought this fabric would look cute in a Simplicity pattern that I have, but it’s in storage, so I can’t even tell you the number!  Necessity is the mother of invention, so what I did was cut a yoke off the Sorbetto, remove the pleat from that piece, and add 1/2” seam allowance at my new seam.  Then for the bottom front piece, I gathered the extra fabric across the middle half, choosing endpoints that I thought looked good. 

IMG_5640

I ended up omitting the dart because the fabric is really thin and I thought the dart would show through to the right side, plus with the gathers here, it is sort of unnecessary.  I mention this because it meant that my armholes did not line up; if you try this, omit the dart from the pattern before you cut the fabric!

As far as construction, I did it the way my Simplicity top suggests.  Briefly,

  1. Finish the neck seam on the back piece with bias facing.
  2. Cut 2 yoke pieces and sew them together at the neckline, right sides together.
  3. Turn inside out and press.  Optionally, stitch the seam down to the back side; this keeps it in place and makes the neckline lie flat.
  4. Sandwich the shoulder seam of the back piece between the 2 pieces of the yoke, right sides together.  This is spatial reasoning at its finest.  When turned right side, out, the whole seam is enclosed; it’s the awesomest seam finish ever.  It’s really hard to describe it; I wish I’d taken a picture!
  5. Gather the lower front piece to fit the yoke.  Match RST with the front piece of the yoke and sew. 
  6. Press the back side of the yoke under 1/2” so it will sandwich the seam you just made.  Pin in place and topstitch from the front, making sure to catch the back piece also, and making sure the seam is pressed upward so it becomes enclosed. 
  7. Sew side seams and it’s done!

Although you can’t see it in the pictures, the cool thing about this shirt is the way there are no exposed seams anywhere, except the sides.  Well-finished seams make for a really professional-looking garment!  You can’t see it when it’s being worn, but as the wearer, you notice it every time you put it on.  It’s not a fitted style of shirt, but this fabric is so breezy that I think it makes for a nicely draped top. 

2012 04 April9

This fabric is so lightweight it is like wearing nothing at all.  The total opposite of my sackcloth linen shirt!  It will be perfect for those hot summer days we get here in Rochest…wait.  We don’t really get any.  But it’ll be perfect for those steamy Seatt…no.  Not there either.  Good thing it looks nice with a cardigan!

IMG_5611

Please excuse the freshly showered look… this is what happens when you wait till the last minute!


Skirt to top, refashion #1

20 04 2012

We’re back at home now, in the land of neat and tidy living.  Here where I have done ridiculous things like line my books up by color.

IMG_5591

I saw it online, and it looks pretty, right?  Normally I have a library-esque system where fiction is on one side and non-fiction, grouped by subject, on the other side.  But as they say, the way you show a house is not the way you live in it.  So true!  This is not me at all but I have to admit I kind of like it.

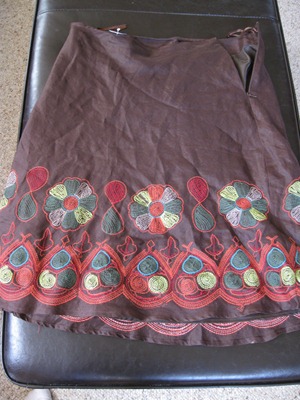
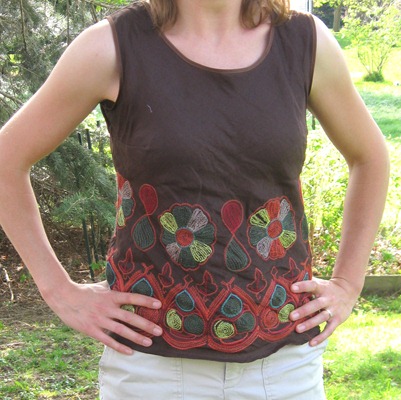
Anyway, back up in NY we have thrift shops on every corner, a luxury (haha!  just saw the irony there) that doesn’t exist down where my parents are.  So, needing shoes for BB and still having the sewing bug (sewing really begets more sewing), I looked around the shop while the boys played with cars.  I didn’t find any good tops to refashion but I did find this skirt that really called out to me; it’s linen, which as I mentioned last time I am very fond of, and it had this funky embroidery.

IMG_5588

Now, when cut apart and pressed it was barely, barely big enough to fit the pattern, again the Colette Sorbetto, without the length added (which was OK because it already has a hem), and without the pleat.  I cut it out and put it together and found it surprisingly baggy.  I guess this fabric is quite a bit stiffer than the last one so it didn’t drape at all, just stuck out like a big hoop skirt.  I ended up taking the sides in about 0.5” each and adding a seam in the back, about 0.5” at the top and increasing to about 2” at the bottom, so a pretty substantial modification.  This closed up both the neck and arm openings, so instead of doing a bias facing, which eats up 1/4”, I pressed my tape to be a double fold bias and applied it to the openings that way.  No hope of eking out sleeves this time!  I am really happy with the final product though.

IMG_5606-001

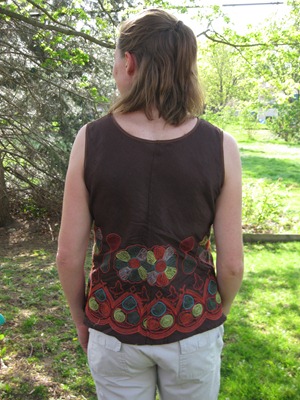
It fits just perfectly!  On the back you can see the seam I added:

IMG_5609

It was unfortunate because this is a really noticeable pattern to stick a seam into!  But it had to be done.  Now, the skirt this came from was fully lined, and after wearing this I can see why – it is super, duper, mega scratchy.  I had a linen blend sling awhile back that eventually gave way to softness and I hope it happens for this fabric too, because right now I kind of feel like some medieval peasant wearing a burlap sack (albeit a pretty one).  The skirt was dry clean only but I hand-washed it and I think I will take my chances with the washer and dryer in the hopes that the fibers can be scrubbed and spun into submission.

The #1 in the title is because I found another skirt, which is now cut apart and pressed and ready to be made into a shirt.

IMG_5590

I actually have a pattern that I thought would be just perfect, I made this muslin of it last year just after the spring top sewalong…

IMG_3651

…but it’s IN STORAGE!  Boo!  So it will probably become yet another Sorbetto, which is fine.  With all the possible variations (sleeves/sleeveless, pleat/no pleat/inverted pleat, etc.) plus the wildly different fabrics, it won’t end up looking like 3 of the same top, which is one of the best features of the pattern.  It’s a blank slate!  So, if I find the time, top #3 here I come!


Don’t forget to check out all the fun stuff going on in the spring top sewalong!


Time for spring tops!

14 04 2012

This year I had resigned myself to abstaining from the spring top sewalong fun, the annual bonanza of selfish spring sewing on Made by Rae.  Those who know me in real life know that we are in the process of trying to sell our house and move cross country, so (*sob*) I packed up my fabric and patterns and put them in storage, sold some off, sent a machine down to my parents’ house, and essentially tidied up my sewing area to be a table with a machine on it and nothing else.  It looks great, but I can’t really do anything with it!  (Like my spotless and empty kitchen, totally unusable!)  So the kids and I are down visiting my parents for a week, because they are on break and it’s impossible to keep things clean with them around.  I was getting a little bored in the evenings, you know, without all that cleaning to do, and I realized it was spring top time, and I had an older machine here… all I needed was some fabric and a pattern!  After poking around online, I decided on the free Colette Sorbetto pattern with the sleeves found here.  I went to Joann and found a linen/cotton blend fabric in a print I adored, just a scant 35” of it left on the bolt, and 2 evenings later, here is the result:

IMG_5553-001

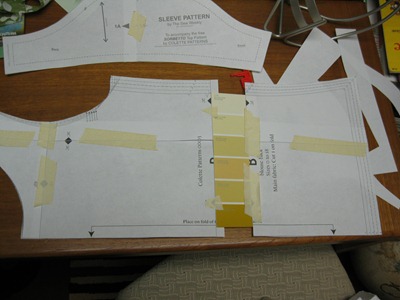
I really like the shirt.  I’ve made several closure-less tops from wovens and it’s a well known fact that these are a little bit on the baggy side.  In order to be a pullover-type top instead of a button/zip style top, they need a good bit of ease.  I made a size 8 (my measurements ranged from size 6 in one part to 12 in another, so I just picked my RTW size and hoped for the best), and the sleeve pattern fit perfectly with it.  The shirt is a little baggy compared to a t-shirt, but it’s not the tent that I was worried it might be.  It is super comfy compared to the other woven shirts I’ve made.  The armholes are not binding and there is plenty of room across the shoulders to move.  I did decide to lengthen it, based on some comments I’d read, and I did this very scientifically by adding a paint chip where the pattern pieces joined, haha!  I did this front and back to ensure they would be the same size.  I hate shirts that are too short and this one is not, with a bit added in.  Oh, I also shortened the bust darts by about an inch, since they seemed long.  No picture of that, but you can be assured it was equally scientific.  That’s just how I roll. 

IMG_5578

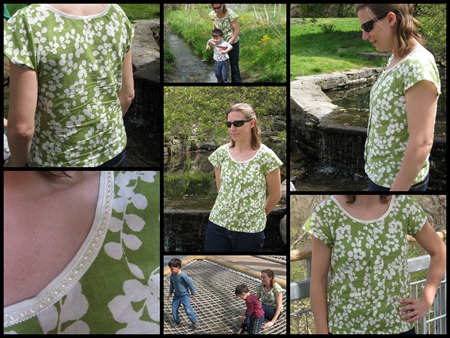
I wore it all day today and was just in love.  It does get wrinkly, which I consider an endearing characteristic of linen more than a problem.  I was able to chase kids all over and I didn’t feel it was tight, or gaping, for that matter, and I love the softness and breathability of linen. On the neckline, I didn’t like the way the bias tape looked (neither did either of my critics), so I covered it with a cute trim that I picked up at Joann while I was fabric shopping without the kids (oh, the luxury!).  You can see it in the bottom left picture below.  It doesn’t show up in the other pictures but I think it adds a great touch to the shirt. 

2012 04 April7

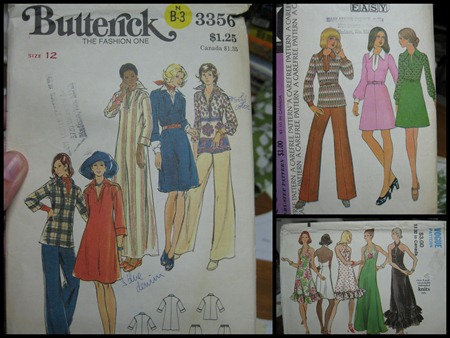
So in the end, I managed to join in the sewing fun, and try out a new pattern that I will definitely make again with some of the fabric that’s wasting away in a storage locker.  I actually like this better than Simplicity 2599, which I bought last year for this same occasion (but didn’t actually make till the fall).  Plus I got to rummage through my mom’s old sewing box for needles and thread and I found these awesome patterns:

2012 04 April8

Too bad I am not bold enough to try the really retro look!


Valentine’s Day

14 02 2012

If you know me, you know I’m a little bah-humbugish about all these so called “holidays”.  Before I had kids, I ignored them completely, buying candy for Halloween just to head off any potential eggings (and failing, I might add), and ignoring Valentine’s day completely, along with St. Patrick’s day, cinco de mayo…you get the idea.  I give you this line from Wikipedia, the source of all easy-to-find knowledge: “No romantic elements are present in the original early medieval biographies of either of these martyrs [Saint Valentine].”  There were 2 (or maybe 3) Saint Valentines, and none of them related to love, marriage, or anything of the sort.  And yet we must buy cards, chocolate, flowers, jewelry?  I always found it so pointless.  But once the kids are old enough, it becomes inevitable.  At school, they had parties yesterday (for BB) and today (for LB), kids hand out valentines, heart-shaped crafts are made, little girls are decked out in pink, red, and heart-emblazoned outfits.  BB has already decided that this whole valentine business must be for girls, because they like pink.  Astute or prejudiced?

Well, we had to do valentines, so valentines we did.  I searched Pinterest for some good boy-ish ones, since BB’s class is all boys.  I found this awesome one on stitch/craft, printed it out, added the glow bracelets we had left over from Halloween (I bought them as non-candy alternatives; you can guess how popular they were), and voila!
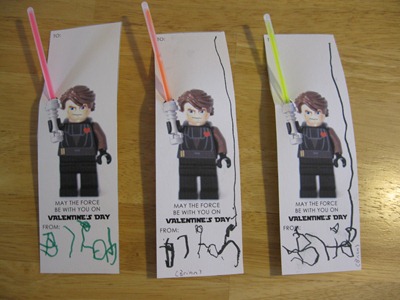
IMG_5343

Super-cool, and very easy!  And wow, BB’s handwriting looks just like his mom’s, haha!  No, my writing is ever so slightly more legible.  He’ll get there.  I also volunteered to make cookies, because I’m masochistic like that. 
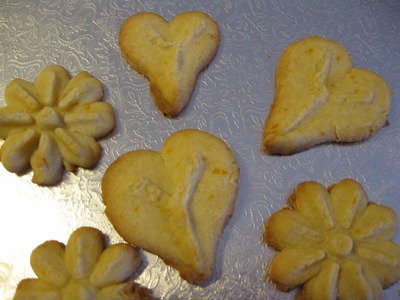
IMG_5344

“Please, give me the job that’s the most work!”  I’m often the last one at drop off and pick up, which means I’m often the last one to sign up for the party supplies list.  Anyway, I was going to do cutout cookies, but decided at the last minute to inaugurate my cookie press, which I’ve had for ages and never used.  Not bad, eh?  It was easier than rolling cookies, but not by a lot. 

Today I made some very, very last-minute valentines for LB.  I found some cute printables here on one charming party, edited the jpg to be just one image, made a table in Word, copied and here it is:

valentine screenshot

I cut them out and stuck them on fruit flats, and there you go, a valentine fit for a 2-year-old who only cares about the fruit flat.  I managed to confiscate all candy after each child had 1 lollipop.  Not too bad. 

Now I had met the minimum holiday requirements.  And yet, I felt like I should do more.  I blame this entirely on Pinterest, which makes it look like everyone does special holiday-themed meals.  (And also handmade valentines.  For anyone whose children are not old enough for this nonsense, or who doesn’t have children period, let me give you a reality check: ours were the only handmade ones in the lot.  So making lovely handcrafted valentines is definitely not a requirement.  Not that ours were lovely; they were very basic and utilitarian in that they used up things I needed to get rid of.  Anyway.)  For breakfast, I added a small heart made of jam to our usual peanut butter and banana oatmeal. 
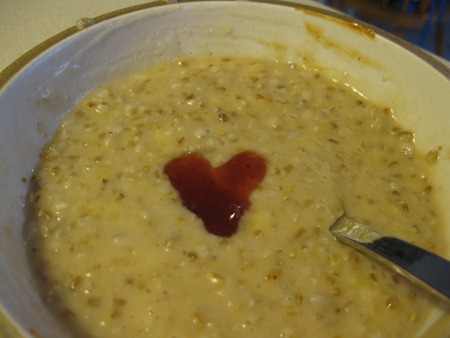
IMG_5347

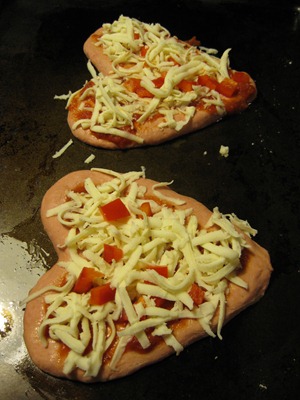
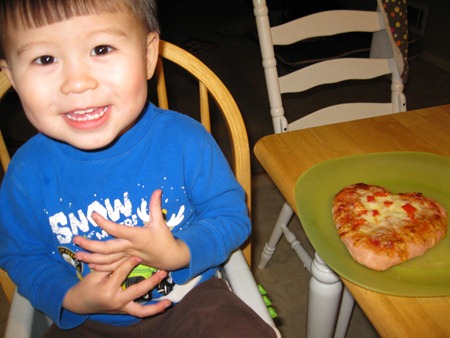
For lunch I brought along some of these wonderful pretzel turtles that I first saw on facebook (thanks Mandy!), then looked up (where else) on Pinterest.  No picture, but if you like turtles (the chocolate, caramel, and pecan kind), check out that link!  Yummmm!  They were really easy.  I made some for LB’s teacher, and some extra for us.  Then for dinner I made pizza, and just for kicks, and because I had beet powder lying around that I need to use up (who doesn’t?), I made pink pizza dough.  I made 2 little heart-shaped pizzas, and let the boys top them themselves.  They loved it!
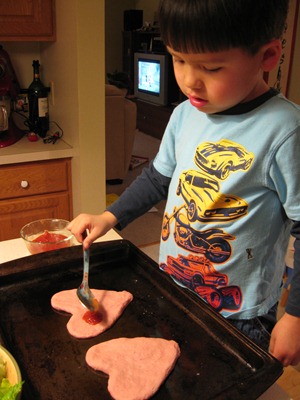
IMG_5348

IMG_5350

IMG_5353

They even (gasp!) ate toppings on the pizza!  Red pepper, to be precise.  It was pretty exciting.  Finish it off with a flourless chocolate cake, and call it a day!
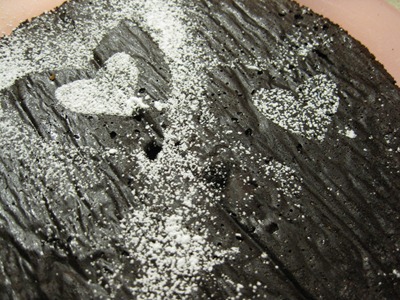
IMG_5355


What became of Christmas – a very belated post

12 02 2012

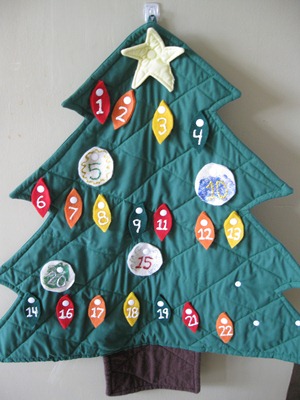
January found our advent tree looking like this:

IMG_5216

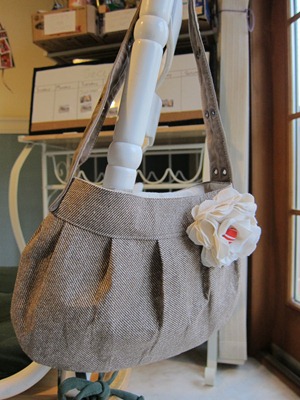
Look closely and you will see that time stopped for us on December 22nd, when family rolled into town.  Follow that with a trip out of town and a bout of illness, and I’ve been away from the computer for a while!  So here is a quick rundown of what I managed to put together as far as handmade gifts.  For my sister, I made another buttercup bag:

IMG_0171 I was so happy with how it came out, and I think she was too!  The t-shirt flower is just attached with a pin, so it can be changed out if wanted.  The strap was an old belt; the lining an old shirt… I am making a slow but steady dent in my “to recycle” pile of old clothing.  Another one to add to that score: a scarf for my mom!

IMG_0048 I didn’t get a picture before I gave it to her, but here it is in action, on Christmas morning!  I made it using this tutorial, from an old cashmere sweater that she had given me to make into pants for the boys.  :)  Well, LB won’t wear “fuzzy pants”, so I found a different use for it!  If I find the time, I might just have to make one for myself….

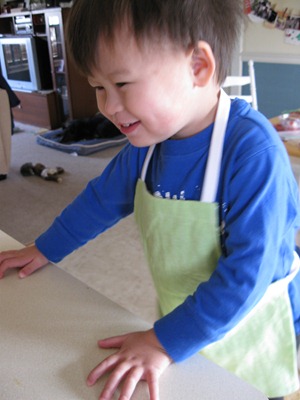
For LB, I was running out of time, but I quickly put together an apron for him.  Not just any apron, this is an apron that matches mine and BB’s; it signifies his promotion to bona fide kitchen assistant!  He was, well, not overwhelmed when he opened it.  Not as exciting as the huge and wonderful toys he received.  But when the commotion died down, he was thrilled to don his apron and “do cooking”, as he calls it. 

IMG_5223 As an aside, the very first sewing pattern I ever bought was for an apron.  I can’t believe I spent the money on it!  I’ve made 3 now with no pattern, and it’s super easy.  The only thing I did differently for LB’s was make the neck band of elastic.  Toddler heads are so big!  Now we all have a matchy-matchy set of green linen aprons.  Yay!

For BB, I also didn’t have much time to make something, but I knew a LOT of lego was in our future, so I made a lego sack

IMG_0085 Not a great picture of it, but you can see the idea.  Toss the legos on the sack (the white circle), pull the strings, and voila!  The legos are contained in a sack.  It’s too bad I don’t have a picture of the outside; it’s a very cute flannel print with monsters.  The one thing I did differently than the tutorial was to put 2 buttonholes on each side, so that the rope can’t get pulled inside the casing.  It’s working out very well to contain the explosion of legos so far!
So, that’s a brief update from the domestic front.  If I have a chance, I have several other (more recent) projects to post!


Oats three ways

23 01 2012

It’s been a while since I wrote about cooking, and you might not sense it from reading this blog, but cooking is obviously what I do the most of, since we have to eat, and it’s something I really enjoy.  Too much, probably.  I have definitely gotten lost in a cookbook only to discover that it’s getting late and I haven’t actually made anything!  I got “Make the Bread, Buy the Butter” for Christmas and have really enjoyed reading it.  Before that, it was “Nourishing Traditions” (and just for fun, I read “Eating Animals” on my iPod—back to back, these two books are the very definition of cognitive dissonance).  It’s been a lot of reading, and I thought I would share just one idea that has made breakfasts much simpler around here.  (If you’re interested, this is from Nourishing Traditions, although Foer would probably approve too, since it doesn’t involve any factory-farmed animals.)

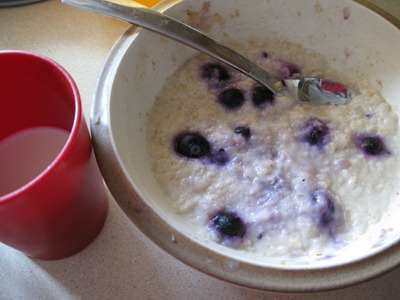
At night, I soak about 1.5 cups of steel-cut oats in about 3-4 cups of water (I rinse them first).  In the morning, boil 1-2 cups water in a big pot and dump in the soaked oats.  Add a pinch of salt, bring to a boil, and cook for 5-10 minutes.  Soaking overnight reduces the cooking time, but more than that, it make the nutrients in the oats more available.  (Supposedly.  For someone more knowledgeable about this, I direct you here.  There are lots of online sources, sometimes contradictory, on the topic of soaking grains.)  So that’s day 1!  Oatmeal.  We like to add in mashed banana/peanut butter, or applesauce/cinnamon, or blueberries/yogurt…there are lots of possibilities!

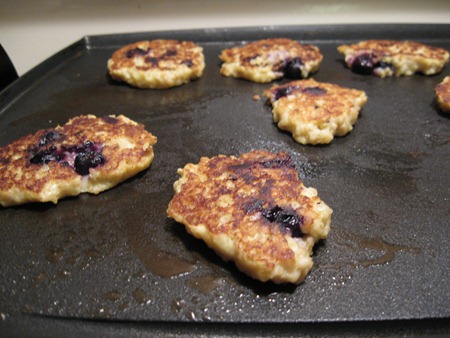
There should be a lot left over (if like me, you are feeding 1 adult and 2 small kids).  So, the next day, just to avoid having oatmeal over and over, we mix it up a bit and make oatcakes.  The recipe in the NT book is so simple: 1 cup leftover oatmeal and 1 egg.  I found that adding a mashed banana adds a bit of sweetness, and I like to add blueberries too.  Then just fry them up on the griddle!  They need to be small or they don’t flip well, so I make lots of little oatcakes.  Very easy, and very popular with the kids!

IMG_5274

Then if there is still more oatmeal (there always is), I found a recipe for muffins that I thought came out really well.  Actually, this search for a muffin recipe came out of a crazy desire to not throw away uneaten oatmeal.  BB usually loves oatmeal, but we all have our off days, and one day I was faced with essentially a whole bowl of blueberry oatmeal to throw out. 

IMG_5218

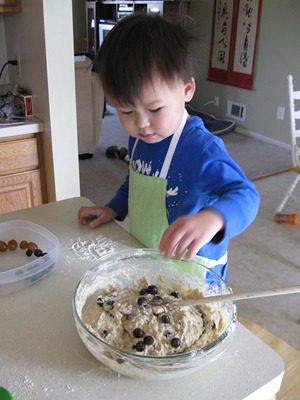
So sad!  I tried several recipes, but found that I liked this one the best.  So get your little helper to don his new apron (that’s right, LB has been promoted to kitchen assistant!), and mix up a batch of muffins, either from leftover breakfast, or straight from the stash of cooked oatmeal left over from the start of the week. 

IMG_5223

He added the blueberries one…by…one.  He really was having fun!

IMG_5221

We also make some peanut butter bars (found here) that are a great snack!  I have to say, I liked it as is, but I also changed it up a bit; I think it’s a great base recipe that is easily tweaked.  So there you have it; oatmeal, oatcakes, muffins…three days of breakfast from a humble pot of oats!