Cloth Diapers

25 02 2010

I started using cloth diapers with big brother, gosh, I guess it was 2 years ago already.  It was the diapers that prompted me to buy a sewing machine, because I realized if I could make my own, I could save big bucks.  So I worked on it, and I’m proud to say that most of my early efforts were completely usable (unlike the clothing I tried to make).  Diapers, I found, are actually really easy to make.  To make “nicer” diapers, like the kinds you can buy (bumGenuis, FuzziBunz, etc.), you have to order special materials, but it still works out to be a couple of bucks per diaper, versus almost $20 retail.

At first, I made my own pattern using velcro, and it was pretty good.  Here is a tutorial, in case you want to try it; it’s the one I used.  Then I decided I liked snaps better, and decided the cost of a pattern was well worthwhile if it produced a usable diaper in one try.  Patterns range from $5-13, so by the time you figure materials and time, it’s a good deal.  For little brother, I made all his diapers, and already he is outgrowing the smallest ones, so I have been working on some size medium diapers.  This has been my sewing project for the last week, and I’m proud to present:

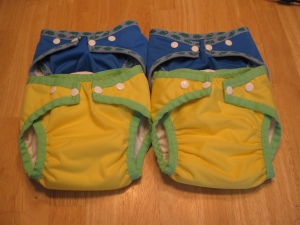
Chloe Toes diapers

I like the chloe toes pattern, although I have very few with which to compare.  They come together really quickly, and I’ll probably try to put together another 4 this week.  They’re a little bit big on LB still, and if there’s something you don’t want, it’s a diaper that is a little baggy in the legs and waist.  🙂  But I’m sure in a few weeks they will be fitting great and it will be time to retire the small diapers already!  These diapers are bound in fold-over elastic (FOE), and the blue ones have little dinos:

Rawr!

Having 2 in cloth diapers is a lot of work, but there is something to be said for having a little fun with diaper changes.  I change a LOT of diapers every day, and I get a little kick out of choosing which diaper to use.  BB likes to pick out a diaper for LB at diaper change time, and he will spend a good minute mulling over the choices.  “Hmmmm…. robots or zoo animals?”

Anyway, sewing diapers has become more of a chore than a fun project, so I’m glad these are done and I can swap out my needle and work on other things.  I spent last night working on a rag quilt for BB–it should be done soon!  And I have my eye on several of the projects from Celebrate the Boy month on MADE and Made by Rae… I will definitely be making some 90 minute shirts in the near future.


Fingerpaints from the pantry

22 02 2010

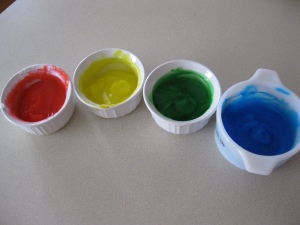
I whiled away the evening yesterday browsing a new crafty site I found, The Crafty Crow.  Really, it’s a roundup of other craft blogs, but it’s great because things are indexed by age level and theme.  There are a ton of things I want to try!  I’m always looking for fun things to do with big brother… 2 1/2 is a tough age, because he’s not quite old enough for a lot of things, and coloring with crayons every day gets a little old.  So, today I made these gel paints that were described on In A Nutshell.  All it takes is cornstarch, water, and food coloring, which are things we always have around, and it was super quick, too!

Ooooh, purdy.

I think it’s safe to say that flannel shirts will not be coming back into vogue anytime soon, so I sacrificed an old shirt to be a smock, and we set to finger-painting. As advertised, these were a great way to teach color theory.  We mixed colors to see what would result, and it was a lot of fun!

Let the art begin!

This was definitely the high point of the day.  In fact, the rest of the day has been a disaster of Titanic-esque proportions (on a domestic scale, anyway).  And it’s not even dinnertime yet!  My thoughts on this project:

* Next time, I would make less.  We painted tons of sheets of paper (and paper plates) and had lots left over.

* I would just do primary colors; the green went largely unused, and it’s kind of unnecessary.

* I’d skip the scent.  I like the idea, but I used mint extract in these, and I don’t want to give the kiddo the idea that it’s food, even though I guess it would be safe to eat.

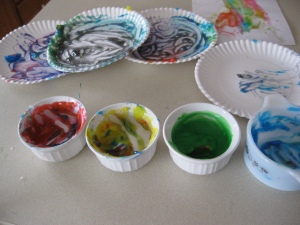
* I would be a “paint nazi” and dole out just a bit at a time.  We made a mess of the paints, which made color mixing hard after a while, since everything was all mixed up:

The Aftermath--our art, and what's left of the paints.

Good times, though!  We’ll do it again!


Freezer paper stencils

9 02 2010

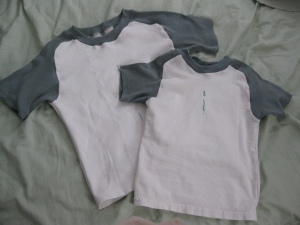
I saw this tutorial a while back on painting shirts using freezer paper stencils, and it sounded like a great idea.  But I never had any blank shirts, so the idea laid dormant in my mind for a long time.  Then I found this tutorial over at MADE, a blog that is having all boy ideas this month… yay!  (Do you get the feeling I spend too much time browsing online tutorials?)  I have lots and lots of t-shirts that are ready to retire, so 2 white shirts and a green one became these:

Blank shirts, fresh off the serger

Then I drew some little robots onto freezer paper, and cut them out.  I wanted something that said “Big brother” and “Little brother”, without using those exact words.  Here’s the final product:

Big robot, little robot

Because, really, what’s the point of having 2 kids if you can’t dress them in matching outfits?


Homemade yogurt–a photo tutorial

6 02 2010

Today I made a batch of yogurt, and I thought I would share the process for anyone who is interested.  Why make yogurt?  There are a couple of reasons that make it worth the minimal time and effort, in my opinion.  Here they are, in no particular order of importance:

* You can control exactly what’s in your yogurt.  No HFCS, colors, gelatin, nothing you don’t want!

* If you are making organic yogurt, it’s MUCH cheaper to make your own.  Organic yogurt can go for $1/6oz cup.  I can buy a half gallon of organic milk for $3 and make it into yogurt, 64 oz. worth, which is a savings of about $7 per batch. We eat a lot of yogurt, so this is a big savings for us.

* It’s tasty!  And fun!  You get to culture bacteria!

Now that you’re convinced, here’s what you need:

*milk (cannot be ultra pasteurized)

*starter cultures (from a store-bought yogurt, can be any kind; I have been using dannon)

*thermometer

*thermos, or other device that holds a steady temperature.

*a pot and a metal bowl

And on to the photo tutorial, so you can see how simple it is!

1) Heat the milk.  In the past I have just heated the milk in the pot directly over medium heat.  This requires constant stirring though, and I have scorched the milk this way, so I decided to try the double boiler method.  Apparently improvising double boilers is common, because I googled “double boiler” and it suggested “makeshift double boiler”, “improvised double boiler”, etc.  I’ll save you the trip to google: you simmer water in a pot and put a metal bowl on top.  The water level in the pot should be low enough to not touch the bowl.  Then heat the milk in the bowl.  How much milk?  However much fits in your thermos.  Mine holds 1.5 quarts.  Here’s a picture of me heating the milk in my improvised double boiler:

2) Optional: add some powdered milk.  This results in a thicker yogurt.  I like thicker yogurt, so I do this, but I suppose I am diluting the wholesome organic-ness of it all.  I’m OK with that.  It does add calcium and protein, too.  I don’t measure, I just sprinkle, about 1/2 cup.

3) Stir this occasionally and check the temperature.  It needs to come up to 185 F.  It is my understanding that this is to kill any unwanted bacteria (ie. you are re-pastuerizing the milk).  No!  Further research indicates that it is to alter the proteins in the milk so that the yogurt will thicken.  And, that the longer you hold it at this temperature, the thicker it will be.  Now, I am no microbiologist, but I have to imagine that this also kills unwanted bacteria, because even pasteurized milk can go bad, hence it must have bacteria.  I will have to keep looking into this.
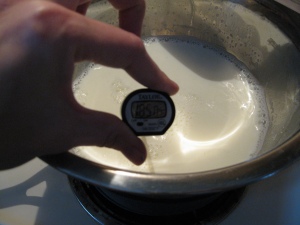
4) Now the milk needs to cool to about 120-115 F.  So, take the bowl off the stove, and put it in a pan of cool water.  This will speed up the cooling process.  Stir occasionally to prevent a skin forming on top, and check your temperature. It’s not a bad idea to warm up your starter to room temperature (you can see mine behind the bowl).

5) Now, to make yogurt, you have to hold the milk at about 110F for a long time.  There are lots of ways to do this, but what I have found to be the best is a thermos.  So at this point, I pre-heat my thermos by boiling a cup of water and pouring it in the thermos.  That way, I don’t drop the temperature of the milk by pouring it into a cold thermos.  While you’re at it, make yourself some coffee, because, let’s face it, you’re not getting a nap today.
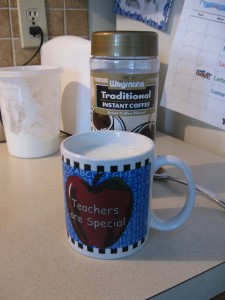
6) Once the milk is at about 120, dump the hot water out of the thermos, and pour in about half of your milk.  Then, add your starter culture to the milk that remains in the bowl.  I use 2-3 Tbsp.  Again, measuring is for sissies.  Stir them in well to disperse.

7)  Pour this inoculated milk into the thermos too.

8)  Put the lid on, and enjoy your coffee and a little snack of yogurt!  I finish off my last batch when making the next.  Then wait for 6-8 hours, and your batch of yogurt will be ready!

So there you have it!  A fun little afternoon project.  You can flavor your yogurt with fruit or jam, sweeten with honey, or just enjoy it plain.  Some final thoughts:

* The longer you let the milk culture, the more tart and firm it will be.  Also, the less lactose will be in the finished yogurt, since it is consumed by the bacteria.  Theoretically, yogurt is OK for lactose intolerant people if it is cultured for long enough that the bacteria digest all the lactose.  With store-bought yogurt, you don’t know if that is the case or not, so there’s another case for DIYing it.

* You can use the yogurt you made this time to start the next batch, just make sure to save a little!  Or, you can freeze a little bit of it to use next time, if it’s going to be a while before you do this again.  I think next time I might buy a DanActive and culture that to see if their “immunity boosting” bacteria are really all that.

* Why doesn’t ultra pasteurized milk work?  Apparently the process significantly alters the proteins in the milk.  Kind of sketchy, if you ask me.  But it’s what we buy mostly, because we don’t go through milk fast enough to drink it before it goes bad.  Well, that’s another advantage to yogurt, I guess: the good bacteria keep the bad ones at bay, so yogurt stays good for a really long time.

* How long does it take?  Not that long, but longer than you think.  There’s a lot of waiting for things to heat, and then cool.  I like to have something else to work on while I stir intermittently.  This time I was cutting fabric. I’m making a quilt for big brother (he picked the fabric), and I’m cutting lots of squares.  I can’t find my rotary cutter, so I’m using scissors, one square at a time.  It is truly a labor of love.

Anyway, let’s just say it took a lot longer to write this than it did to make the yogurt.


Into the blogosphere

3 02 2010

Hello world!  Welcome to my corner of the net.  I’m a stay-at-home-mom, at least partly by choice, and always busy with two young boys.  But in whatever time I can carve for myself, I love to make things.  It started as a hobby, making cards and soap and little things, but over time, it has become a major obsession.  When the boys are asleep, I sew.  When they are awake, I cook.  In the summer, we have a very small garden.   Very small.  But it’s a lot of fun (well, for big brother, anyway, little brother hasn’t seen it yet).  I love to share the things I make, and I was starting to feel like I spent all my time on facebook posting pictures of things I made.  So, to spare my friends the stream of pictures, I’m moving it here, where anyone can follow, if they are interested.

We have a blog for the kids already.  But sometimes, there are things I want to share that are not about them.  People who go to work get to talk about work with coworkers, but those of us who stay home don’t have that opportunity.  (Believe me when I say my 2 year old is not impressed by the things I sew, and he could not care less what I cook.)  I enjoy reading other people’s blogs, and I often get inspiration and instruction from them; it forms a little community similar to what I left behind when I left the workforce.  I have never worked harder to achieve less, and here I will share my little joys and triumphs, and the failures too.

Oh, and as for the name of the blog… this is kind of silly, so bear with me.  There is a blog I saw called “he sows, she sews”, and I thought that was terribly clever.  I thought, what does my husband do?  He’s a surgeon.  He’s a surgeon, she’s a sewing?  No, that’s dumb.  Wait, wait… he’s a surgeon, she’s a’ sergin’!  Haha!  It’s really only funny if you know what serging is, I guess, but trust me, I do lots of it.  It’s a kind of sewing.  So, it’s a bad pun.  I like bad puns, so I stand by it unapoloRing slinggetically.  It probably won’t be the last one.

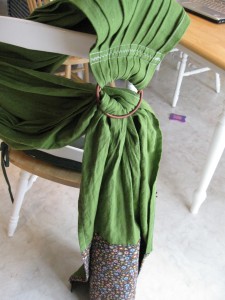
So, to get the ball rolling, here is my latest project.  I’m pretty happy with the way it came out.  It’s a ring sling, for carrying little brother, because he likes to be carried.  It’s a single layer linen/rayon blend with a pleated shoulder (sleeping baby production style, thanks to Jan Andrea), and a little bit of calico on the end for decoration. Not the best picture, but it’s hard to photograph.

It already gets a lot of use!  I can even get little brother asleep in it, and sew while big brother is napping.  So, hopefully I will have regular updates and new projects to show!