Easter Eggstravaganza

31 03 2010

Sorry, I couldn’t resist the bad pun!  In honor of Easter, we have been doing all kinds of egg-themed crafts.  First up, painted foil eggs, from Kids Craft Weekly.  This was great.  Just at BB’s level.  He loves to paint, and that’s really all this is.  I cut out the cardboard and covered it in foil, and he went to town painting the eggs.  Then, with a q-tip, we removed some of the paint so the foil would show through.  Easy and fun for a 2 1/2 year old, which proved not to be true of some other crafts we tried!

The artist at work!

Bonus: this is also a showcase of a quick sewing project… Remember the old flannel shirt I sadly sacrificed to be a smock?  Well, the sleeves were too long (duh) and it was dragging in the paint, so I did a little wardrobe refashion, made elastic-cuffed sleeves, removed a lot of fabric all around, and added snaps so it just snaps on.  So far it works a lot better than it did!

They were a collaborative effort.

Today we dyed eggs using natural dyes.  I found the instructions on Martha Stewart, so right away you know it’s going to be too much work.  But what the hey, we’re home all day!  So basically, you boil red cabbage to make blue dye (which looks purple, so confusing for a child), beets to make red dye, and turmeric to make yellow dye.  Now this was a LOT of fun.  Martha, I mock you, but you have the BEST crafts.  We did 6 eggs because that was all I could hard boil at once, but I can see myself making another batch tomorrow night after the kids go to sleep and just doing it myself.  I saved the dyes, so all the hard work and mess is done.  There is something insanely satisfying about extracting coloring from plants and then mixing it like an alchemist to get the perfect hue.  BB was just happy because he got to stir and things turned colors.  He’s easy to please!

Oooh, it's yellow!

After the first three, I decided to try wrapping one with a rubber band and over-dyeing it, but it didn’t turn out so well.  It’s interesting, I guess; it’s on the far left below:

So colorful! And not at all scary to eat!

You can change the depth of color by leaving the eggs in for different amounts of time, and like with all color mixing, you can get secondary shades by mixing the primary colors.  There are so many more egg-decorating techniques I would like to try (like all of these, especially the wax ones), but I think this year, just straight-up dyeing is as complicated as we will get.  The weather will be getting nicer for the rest of the week, so it’s time to start working in the garden, but we will have a few more Easter crafts to share!


Pizza–Nature’s Most Perfect Food.

25 03 2010

I love pizza.  LOVE it.  If I could only eat one thing for the rest of my life, this would be it, without a doubt.  And, as with most things I like to eat in large quantities, I like to make it myself, for all the usual reasons.  It’s a HECKUVA lot cheaper than calling Papa John’s every week.  (Wait, calling?  What is this, 1995?  They have my credit card info and all my favorite orders saved on their website, and that’s dangerous.)  And it’s a million times better than frozen pizza.  It doesn’t take long to make, and it’s really kind of fun.  Tempted yet?

Yes, there is one plain slice, for the pickiest among us.

The Sauce:

Once upon a time, I found a recipe that claimed to be a Papa John’s copycat recipe, so I wrote it down, and have been using it, modified, ever since.  It makes enough for 4 pizzas, so I divvy it among little Tupperwares and freeze for future pizza nights.  Here goes:

  • 1 can crushed tomatoes (the big kind, 28 oz.)
  • 3 t. sugar
  • 1 t. salt
  • 1 t. oregano
  • 1 t. garlic powder
  • 1/2 t. basil
  • 1/2 t. thyme
  • 3 t. olive oil
  • 1 t. lemon juice

Just place everything in a small saucepan and simmer awhile.

The Crust:

Sometimes I do this in the bread machine, and I use the recipe from the booklet for that.  But, if we have time to kill, BB is always up for mixing things, so we’ll make it by hand.  It’s not so hard, especially with a little helper, and it’s fun because you get to get your hands dirty.  My recipe is ever-evolving, but here’s where it stands right now.  It makes just enough for our pizza pan, which I have no idea what size it is (14″?  15″?  something like that).

In a medium bowl, mix:

  • 1 c. warm water
  • 1 1/2 t. yeast
  • 1 T. sugar

Stir to dissolve the yeast and let sit to proof.  Then add:

  • 1 T. olive oil
  • 1 t. salt
  • 1 c. whole wheat flour

And mix well.  Then add in white flour, or bread flour if you have it till the dough is workable by hand (ie. not a sticky mess).  It’ll take about a cup.  Then, turn it out onto a floured surface and knead it, adding more flour as needed, until it is nice and elastic.  It should form a nice ball and spring back if you poke it.  I find it better to err on the side of too little flour, otherwise it gets stiff and hard to work with.  Coat the ball of dough with oil, cover with plastic wrap, and let it rise.  I usually pre-heat the oven a little since our house is pretty cold, and leave it there to rise.

Putting it all together:

Once the dough has doubled, and the sauce is ready, it’s time to make pizza!  I just stretch the dough to fit in my (oiled) pizza pan.  Spread about 1 c. sauce, and top however you like!  This pizza had spinach, roasted red peppers, and roasted garlic.  I have to say it was pretty amazing.  And, Papa John’s, as much as I love it, offers none of those fine toppings.

Mmmmmmm..... pizza.....

Bake at 400°F until the crust is browned and the cheese is melty and a little browned… then try to let it cool a bit and dig in!  It’s such a fun meal to have for dinner, and reasonably healthy, depending on what you put on it.  Now, I have read a lot about pizza.  And I have eaten a lot of pizza.  Let’s just say this is a well-researched topic here.  This will not be quite like those amazing specialty pizzas you get at those wood-fired oven places.  Apparently they get those awesome crusts by having an oven that cooks at 800°F!  Not an option for most home cooks.  Unless you are maybe Martha Stewart and you build a brick oven for that purpose, because you will NOT eat sub-par pizza.  But for the rest of us, a homemade pizza is easy, cheap, and pretty darn good.  I would eat it any day!  Or every day!


Magical mystery paintings with watercolors

10 03 2010

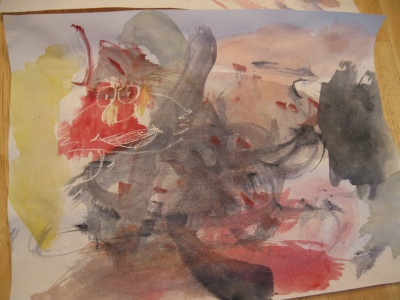
Well, *I* think it looks like Elmo.

We did this activity a while back, and I don’t remember now where the inspiration came from.  It was a really simple and fun craft that met my most important criterion: easy to clean up.  I made the rookie mistake of letting big brother color with markers, so-called “washable” markers, I might add, and the marks are still on the kitchen table–nothing gets them out.  Same with food coloring… those food coloring based paints we did were a lot of fun to play with, but you have to wipe them up ASAP to prevent stains.  Well, not so with watercolors.  These are a little trickier than regular paint to use, but so worth it in the end.

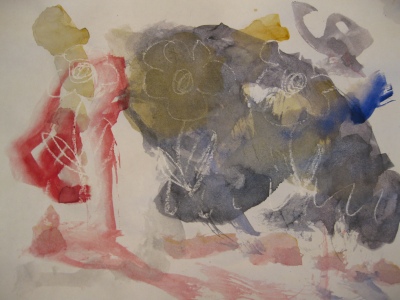
What I did beforehand was draw a picture on a sheet of paper using a white crayon.  (Funny story–BB always tells me when he colors with his white crayon that it’s not working… maybe it needs batteries.  Haha!  The minds of children.  In his world, I think everything runs on batteries, so needing new batteries is the answer to everything.)  My drawing skills leave a lot to be desired, but I did my best.  The drawing is essentially invisible until he colors over it with the watercolors, then the drawing shows up as white lines.  I tried to draw Elmo, but he didn’t recognize it.  I did a Curious George drawing that I thought was darn good, and he thought it was “ummm, a bulldozer?”  To be fair, that was a full-page sized drawing, and he didn’t color the whole page, so it was hard to tell.  I think little drawings worked best.

Flowers... it doesn't get simpler than that.

Flowers... it doesn't get simpler than that.

I had to repeat a few times, “Water, then paint, then paper,” and sometimes he just painted the paper with water, but once he got the hang of it, he really went to town.  I think soon we’ll be able to wallpaper our house in his paintings, and I have to admit I feel a little bad about the sheer quantity of paper we go though, but I can’t think of another way to make paintings, so tree-killing it is.  It’s ironic because at the moment, his favorite story is “The Lorax”, and here we are, “more paper (15 seconds elapse)…more paper (15 more seconds)… more paper…”, you get the idea.  So, if you don’t mind burning though a lot of paper, this is a fun activity; we both enjoyed it.  I liked drawing pictures as much as he liked revealing them.  The pictures here aren’t the best, but if you look closely, you can see the white drawings that appear magically when the paper is painted.  The flowers he was able to recognize right away… maybe I have some artistic talent after all, haha!


A little taste of summer

5 03 2010

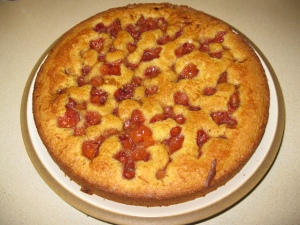
Last summer, I got very industrious and bought a huge crate of sour cherries at the public market and canned them, thinking it would be so great in the middle of the long, long winter to have some cherry-laden desserts.  Fast forward 7 months, and they are still sitting in the closet, waiting for *just* the right moment.  Well, winter is showing signs of letting up already–birds are coming back, ponds are thawing, the sun is shining and the snow is starting to melt.  So I think the “right moment” probably came and went already, but with a little baby at home, I didn’t have much time to bake.  Now I’m on a mission to enjoy these cherries while the weather is still a little bit unpleasant, so I have been looking for ways to use them.  Last weekend it was a clafoutis, and today, a cherry tart.  I have to say, the cherry tart was better. It was easy too.  Supposedly, the clafoutis is easy too, because you mix it in a blender, but I’m sorry, if I have to go digging through the cupboards to find all the blender pieces, assemble it, use it, and then wash it and put it away, no thanks.  Mixing in a bowl is just easier sometimes, especially when you have an eager helper who always wants to mix something, anything.  The tart would have been really quick in the KitchenAid, but as I said, I have a little human mixer who doesn’t want to do it that way.  The recipe is adapted from one on Chowhound, called Laurie’s Pear Tart.  And really, it’s more like a cake than a tart, although maybe it’s more tart-ish with the original pears.

Cherry Tart

Cherry Tart

In a bowl, cream:

  • 1 stick butter, room temperature
  • 3/4 cup sugar
  • 1 tsp. vanilla extract
  • 1/2 tsp. almond extract

Then add:

  • 2 eggs, one at a time

Then mix together the following, and add it to the butter/egg mixture:

  • 1 cup flour
  • 1 tsp. baking powder
  • 1 tsp. salt

Grease an 8″ or 9″ pan (original recipe says 8″, I used 9″ because it’s what I have), spread the batter in it (it’s thick), and then press the fruit into the top.  (The canned cherries I used are like the canned cherries you can buy in the baking aisle; make sure they are packed in juice).  Sprinkle some brown sugar on top.  Bake at 350°F for 30 minutes or so, till brown on top and a toothpick inserted into center comes out clean.  Let cool, and enjoy!

I made this all the time last summer, and that’s saying something because I don’t really like to bake in the summer.  It’s a really easy dessert to make to use up all the fruit you buy at the market that is starting to go bad before you have a chance to finish it.  That happened a lot around here!  I made this with peaches, blueberries, raspberries, and combinations of those three.  I think the cherry variation is the best so far, though!


Rag quilt, done at last!

4 03 2010

I finally finished the quilt I have been working on for big brother!  I’m so excited.  Many websites led me to believe that making a rag quilt is a simple, couple-of-hours project.  Wrong!  So here’s the story.  Lately I have been sewing a lot of baby gifts for friends, and I love doing baby gifts, it’s a ton of fun, but lately I felt like I was neglecting my own kiddos in my sewing.  So I quickly put together a blanket for little brother out of scraps from my endless supply of Joann’s snuggle flannel.

Cute, eh?

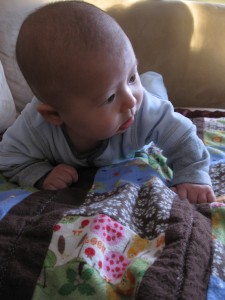
I thought that was better than a picture of the blanket alone.  🙂  Then I took big brother to Joann one day and let him pick some fabrics for a blanket of his own.  He very excitedly chose Curious George, Clifford the Big Red Dog, neon green, and some construction machines.  Organizing them in an aesthetically appealing way was a challenge!  For the actual construction, I found a tutorial at Green Apple Orchard, and more or less followed it.  I started it back when I posted the yogurt tutorial, so it’s been about a month of work!  Now, to be fair, we were out of town for a while, and I might have worked on other projects too, but this was most of the sewing I’ve done.  And it’s only toddler bed sized!

The top

Closer view of the top

The back of the quilt

The navy and stripes were fabrics I had on hand.  There’s one big “oops”; can you see it?

After all that, I have to say that BB was not that excited about it.  Oh, well.  I’m excited to have finished my first real quilt!  I thought I would add a few tips from the experience, for anyone who wants to try it themselves:

* This would have been so much easier if I had planned the size out and THEN gone fabric shopping.  As it was, I let BB pick fabrics then bought a random amount of each.  This is a really dumb way to go about making a quilt.

* I pre-washed the fabrics out of habit, then read it was unnecessary.  The cutting would have been a lot easier on unwashed fabrics.  Oops.

*  My final big oops was in the ragging–I spent hours cutting the edges every 1/4″, and I thought I was being careful, but I must have cut seams, because when the quilt came out of the dryer, it was full of holes.  I went back and sewed them up, but I should have been more careful initially.

That’s it!  I think next time it will be a lot easier, and there probably will be a next time, when BB moves to a bigger bed.