Oats three ways

23 01 2012

It’s been a while since I wrote about cooking, and you might not sense it from reading this blog, but cooking is obviously what I do the most of, since we have to eat, and it’s something I really enjoy.  Too much, probably.  I have definitely gotten lost in a cookbook only to discover that it’s getting late and I haven’t actually made anything!  I got “Make the Bread, Buy the Butter” for Christmas and have really enjoyed reading it.  Before that, it was “Nourishing Traditions” (and just for fun, I read “Eating Animals” on my iPod—back to back, these two books are the very definition of cognitive dissonance).  It’s been a lot of reading, and I thought I would share just one idea that has made breakfasts much simpler around here.  (If you’re interested, this is from Nourishing Traditions, although Foer would probably approve too, since it doesn’t involve any factory-farmed animals.)

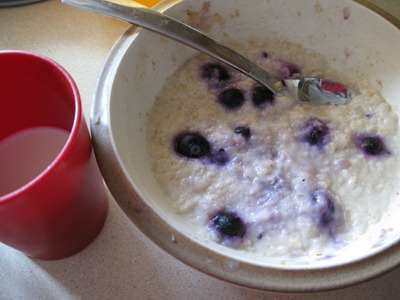
At night, I soak about 1.5 cups of steel-cut oats in about 3-4 cups of water (I rinse them first).  In the morning, boil 1-2 cups water in a big pot and dump in the soaked oats.  Add a pinch of salt, bring to a boil, and cook for 5-10 minutes.  Soaking overnight reduces the cooking time, but more than that, it make the nutrients in the oats more available.  (Supposedly.  For someone more knowledgeable about this, I direct you here.  There are lots of online sources, sometimes contradictory, on the topic of soaking grains.)  So that’s day 1!  Oatmeal.  We like to add in mashed banana/peanut butter, or applesauce/cinnamon, or blueberries/yogurt…there are lots of possibilities!

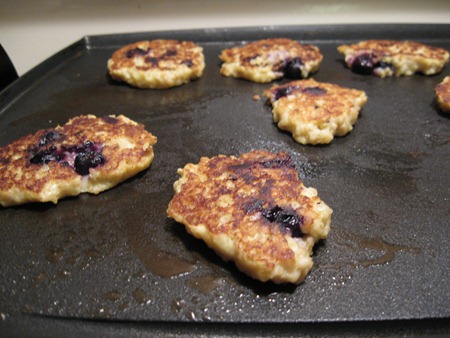
There should be a lot left over (if like me, you are feeding 1 adult and 2 small kids).  So, the next day, just to avoid having oatmeal over and over, we mix it up a bit and make oatcakes.  The recipe in the NT book is so simple: 1 cup leftover oatmeal and 1 egg.  I found that adding a mashed banana adds a bit of sweetness, and I like to add blueberries too.  Then just fry them up on the griddle!  They need to be small or they don’t flip well, so I make lots of little oatcakes.  Very easy, and very popular with the kids!

IMG_5274

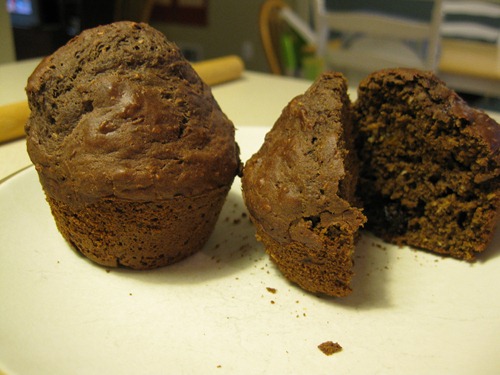
Then if there is still more oatmeal (there always is), I found a recipe for muffins that I thought came out really well.  Actually, this search for a muffin recipe came out of a crazy desire to not throw away uneaten oatmeal.  BB usually loves oatmeal, but we all have our off days, and one day I was faced with essentially a whole bowl of blueberry oatmeal to throw out. 

IMG_5218

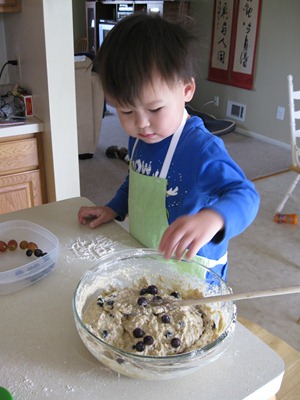
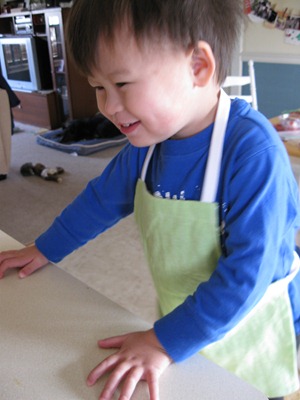
So sad!  I tried several recipes, but found that I liked this one the best.  So get your little helper to don his new apron (that’s right, LB has been promoted to kitchen assistant!), and mix up a batch of muffins, either from leftover breakfast, or straight from the stash of cooked oatmeal left over from the start of the week. 

IMG_5223

He added the blueberries one…by…one.  He really was having fun!

IMG_5221

We also make some peanut butter bars (found here) that are a great snack!  I have to say, I liked it as is, but I also changed it up a bit; I think it’s a great base recipe that is easily tweaked.  So there you have it; oatmeal, oatcakes, muffins…three days of breakfast from a humble pot of oats!
Fun in the kitchen

9 08 2011

One of my unstated summer goals is to keep up with the produce from our CSA.  Sometimes it’s easy; we go through broccoli like crazy and there can never be enough.  But some other things are harder, like greens, cabbage, and beets.  Fortunately, the kids are pretty good about trying new things and they have really embraced kohlrabi and zucchini, and tolerated spinach and swiss chard.  BB and I love to make muffins, so I looked up a beet muffin recipe and came up with this one

IMG_4088

Wow, did they ever rise!  That’s probably the biggest compliment I can give them, though.  That and they used up a beet, so that’s good too.  They were OK and the kids ate them but I didn’t think they were that great.  We might make them again to use up one last tough beet that’s hanging around, but the rest of the beets are getting eaten straight up by the adults. 

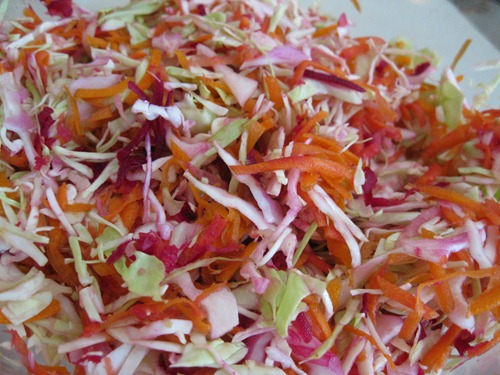
For the cabbage, really the only way I like to eat it is in coleslaw.  Now I don’t know why it too me so long to figure this out, but I just shredded it in the food processor, along with a carrot, a little onion, and half a raw beet; look how pretty!

IMG_4128

I dressed it with a homemade coleslaw dressing, which I altered a bit by substituting some yogurt for mayo.  I love how the beet looks like red cabbage, although it makes the dressing turn a screaming shade of pink.  :) 

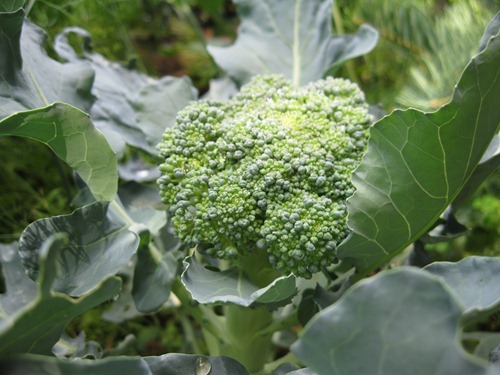
And because we never get enough broccoli from the CSA, I decided to try growing it this year.  It hasn’t been doing so well, but finally we are seeing some crowns.  It’s beautiful!

IMG_4145

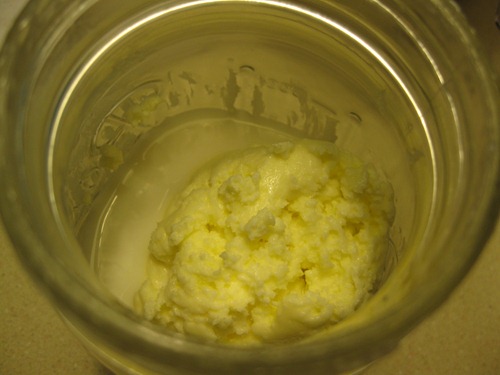
Unrelated to veggies, BB and I made butter!  Just for fun, because I had never tried it.  I got a pint of heavy cream, left it at room temperature for an hour, poured it into a glass jar and we took turns shaking it until it looked like this:

IMG_4132

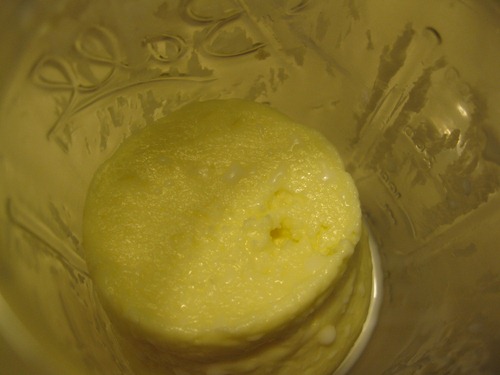
Then I poured off the buttermilk into another jar and shook it again:

IMG_4133 

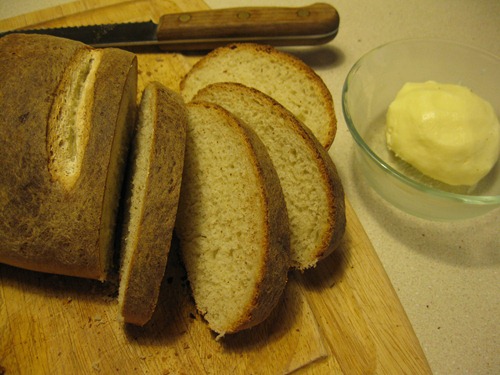
It made such a nice little cylinder!  Then I transferred it to a small bowl and rinsed it with water until all the buttermilk was out, and kneaded in a little salt.  A fresh loaf of bread and we are ready for a snack!  BB loves bread and butter and this was a fun way to see how butter is made. 

IMG_4135

I checked out “Pretend Soup” from the library and I’m looking forward to letting BB be the head chef on our next round of kitchen adventures.  I think he’ll get a kick out of it!


Shiver me Timbers, Big Brother turned 4!

26 07 2011

This is the first time I have done a real kids’ party; in the past we have mostly just done small, simple, mostly family-only type parties.  But this time I wanted to do something a little more elaborate, since next year on his birthday we will probably driving cross-country to a new city… this was our last hurrah!  BB is big into pirates so I scoured the web and actually came up with very little.  In this case, good old fashioned books from the library (Hit of the Party, The Penny Whistle Party Planner, and Perfect Kids’ Parties) had some great ideas.  I thought I’d share some ideas here for anyone who might be looking to do something similar… not that the party was by any means perfect, as the book would have you think, but the ideas were cute and had potential. 

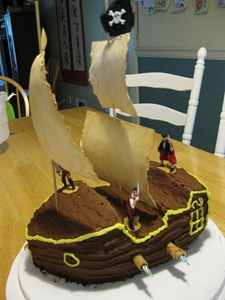
For starters, my “magnum opus”, as my husband and I called it:

IMG_4035

Chocolate cake with chocolate frosting, a 9×13 cake arranged following the instructions here.  The only structural thing I did differently was take the bit I cut out from the middle and add it onto the back, which I thought improved the appearance.  I ignored their decorating ideas and instead browsed images online to find what looked best.  I liked the look of yellow icing for contrast and kept it pretty simple.  The cannons are wafer cookies and I put the candles in them to prevent the sails from catching fire.  BB and I made the sails together, painting them with tea to make them look aged.  I guess I could have added more decoration but decided to quit while I was ahead, haha!  I did spell out BB’s name on the back… it is the S.S. B.B.

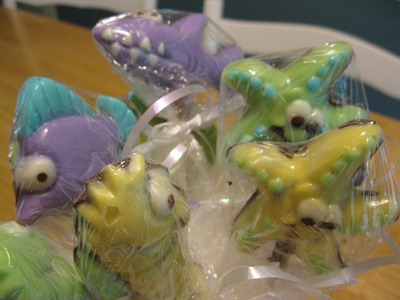
For prizes and favors I made some sea creature chocolate lollipops:

IMG_4046

Michael’s had some pirate ones but honestly I thought they were pretty ugly for lollipops and decided on these instead.  I used white candy melts and colored them with Wilton gel colors.  There was much debate online whether these can be used, and I found that they worked fine without seizing the melts.  Mixing the colors and painting the molds was a lot of fun and I will definitely be doing this again!

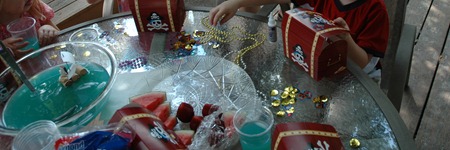
For activities, I hid some gold and silver bead necklaces in the sandbox so the kids could dig for buried treasure. Then they could decorate treasure boxes and pirate hats, here is an overview of the mayhem:

DSC_0422

Ah, you can see my little castaway in the blue punch:

IMG_4068

And the fruits of their efforts, a cute little feathered pirate hat and lots of booty:

DSC_0448

The hats were three pieces of felt, stiffened, then decorated with stickers, feathers, and pirate confetti from Party City.  Once one piece was decorated and the glue dry, I stapled two more felt pieces to make the standard tri-point hat.  This was a book idea with a template. 

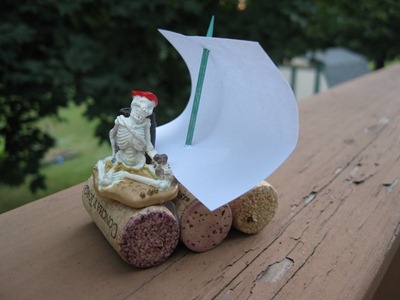
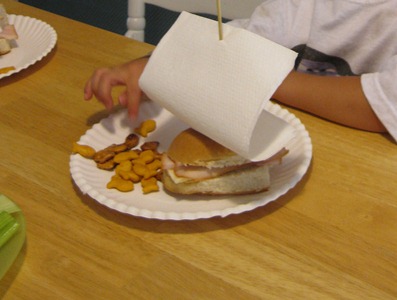
Lunch was pirate boats and goldfish:

IMG_4048

followed by cake and ice cream!  For games we did “pin the eyepatch on the pirate” and “tick-tock, find the croc”, where the kids took turns hiding a crocodile with a kitchen timer attached, then looking for it.  It was supposed to be like the crocodile from Peter Pan, with a ticking alarm clock in it.  Another cute idea, I think it went down really well but I was getting lunch set up while they played, so I have to give a big thanks to my husband and friends who helped keep things running while I disappeared to set up this, that, and the other.  Finally, I scattered chocolate “gold coins” in the yard for the kids to find in their treasure boxes. 

Whew!  It makes me tired to think about it!  I wish I could say BB loved it, but honestly, he did not seem that into it.  He’s not terribly social and I think having that many people over (just 4), and being told what to do and say (like “thank you”) are things that don’t sit well with him so he had the best time when I (the crazy bossy planning lady) was not around.  Ah well.  I won’t have to try it again for another 2 years!


Waffles!

27 02 2011

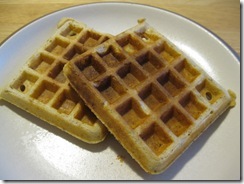
It’s been a while since I shared any of my favorite recipes, so I thought I would write about my current favorite (which is also out of the Cook’s Illustrated score from a while back).  Waffles!  Now, usually I would say “Waffles?  That’s too much work when you have 2 little guys clinging to your legs at 6am.”  But the great thing about these is that they are yeasted waffles, so you mix them up the night before and in the morning you just fire up the waffle iron and you are ready to go!  It’s as fast as toasting freezer waffles, and so, so, so much better.  Convinced yet?  Here’s my recipe, which is substantially modified.  (I love butter as much as anyone, but we eat these a lot, and a whole stick is a bit much.)

IMG_3319

 ** Yeasted Waffles**

* 2 cups milk

* 4 T butter, melted

* 2 eggs

* 1.5 t vanilla

* 1 T sugar

* 0.5 t salt

Warm milk in microwave (so when you add melted butter it doesn’t solidify on top…ask me how I know).  Add in the butter and whisk well.  Add eggs, vanilla, sugar, and salt and mix it all up.  I do this in a great batter bowl thing I got at wal-mart; it holds 8 cups, which is good because this recipe will about double overnight in the fridge, so make sure whatever you use is big enough.  Next add:

* 2 cups flour (I do a 50:50 mix of white and whole wheat, add in some flax meal if you are feeling really crazy)

* 1.5 t instant yeast

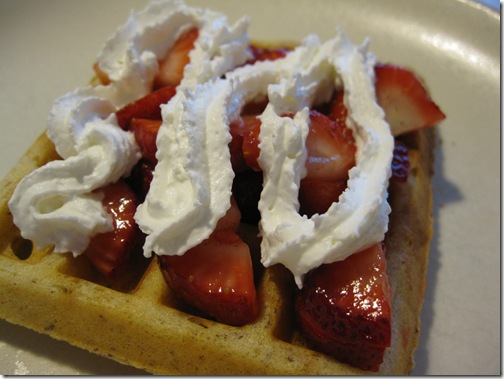
Whisk it all up till smooth, cover and pop in the fridge.  In the morning just pull it out, stir it down and cook!  The boys love it, but honestly they would eat cardboard if you presented it like this:

IMG_3320

Oh man, I don’t care how out-of-season strawberries are, this was so good.  So good.  I am ready for spring and more strawberries… 

Let me know if you try it!  I hope you find, even with the modifications, that they are “crispier, tastier, and more convenient to prepare than regular waffles”, as CI says.

(By the way, I am not done with Celebrate the Boy, not by a long ways, I am hard at work on a Scavenger Hunt bag for BB and it has been a 3 day project but I’m excited for the final result!)


Homemade ice cream—without a machine

21 12 2010

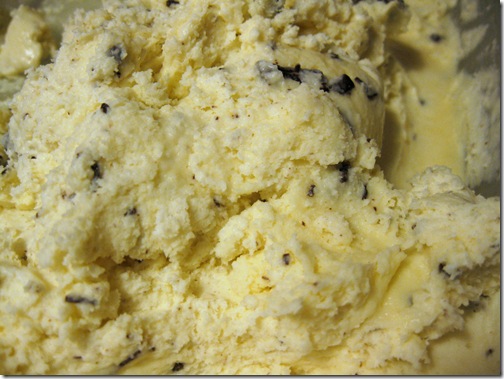
Our advent activity yesterday was to make ice cream.  I know, you’re probably thinking “Ice cream?  In December?” and usually I would agree.  I never buy it in the winter, and hopefully that helps the calorie balance sheet a little since we overdo the cookies, candies, and hot cocoa this time of year.  But this was one of those happy coincidences…  I have no idea what led me to this, but I found a post about making ice cream without a machine.  And wouldn’t you know it, I had 3/4 a quart of cream left over from making caramel that needed to be used ASAP.  (I had thought of making some other caramel recipes but was put off by the effort involved in that first recipe).  So I put on the calendar “Make ice cream” and thus began our tastiest advent activity yet.  It took a while, but mostly just waiting time, the active time was pretty minimal.  If you want to try, here’s what we did:

  1. Put a 9×13 glass pan in the freezer.  (Making room for that was the hardest part of this project.)
  2. Get your helper to stir up: 3 cups cream, 1 cup milk, 1 cup sugar, 1 teaspoon vanilla, 1 teaspoon peppermint extract, and 1/2 teaspoon salt, until all the sugar dissolves.  (The original recipe called for 2 cups each of cream and milk but I needed to use 3 cups of cream). 
  3. Pour the mixture into the chilled glass pan.
  4. Come back every 30 minutes or so and stir it up.  BB started helping with this, but it’s not too exciting so eventually I just took over. 
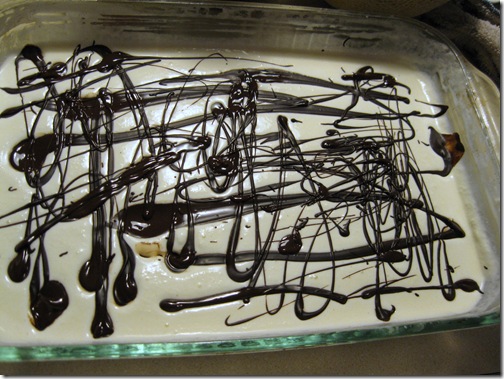
  5. Once it’s getting solid, melt some chocolate and drizzle it over:IMG_3062
  6. Freeze it some more, and the attack it with a stick blender to break up the chocolate. 
  7. Go and eat dinner and when you are done, scoop up some ice cream for everyone who ate a good dinner!  There was never such a good enticement; I have gotten 2 good days of clean plates from BB.  Even though it was yesterday he is still talking about how we made ice cream, so I would say this activity is a keeper!  IMG_3064


Holiday goodies

15 12 2010

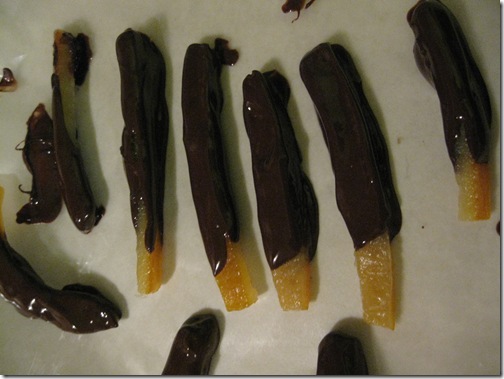
In addition to our daily advent fun, I have been doing some more, shall we say, challenging cooking.  I have not been in the mood to make cookies so we bought a candy thermometer, some good melting chocolate, corn syrup, heavy cream…all the things you would only get away with buying at this time of year.  First up, chocolate dipped candied orange peel

IMG_2959

The verdict: not really that hard, though fairly time consuming.  It took a morning to do the peel, then after the kids were in bed at night, I did the dipping in chocolate.  But the ingredients were few and the active work involved was pretty minimal.  The results were very tasty!

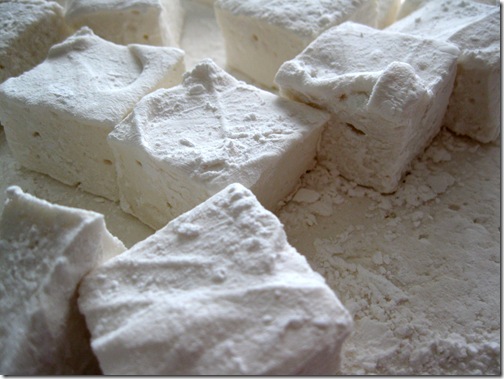
Next, making marshmallows (with BB). 

IMG_3049

The verdict: the only hard part was getting the thermometer in the liquid.  The liquid was not deep and my pot was too small to clip it on, so I had to rig a stand for the thermometer.  Other than that, the mixer does all the work, so I would say it was a piece of cake.  BB is loving the marshmallows, and I made them with the thought of giving them along with hot chocolate on a stick to his teachers.  It made quite a bit, so I think we’ll have enough.  They are tasty, but I don’t see that they are that much different from the store bought kind.  No artificial colors or flavors though, so that’s a perk.  I would do it again. 

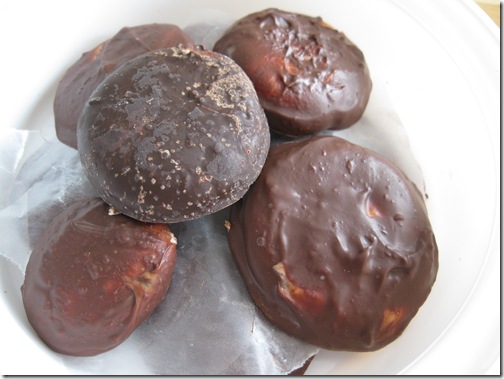
Next, I saw these homemade peppermint patties and decided to try them, because we had a bunch of sweetened condensed milk that I don’t know what to do with. 

IMG_3046

The verdict:  well, this is my fault.  I had mint extract, not peppermint extract, and it came out OK, but not great.  Really tricky.  I froze the patties for about 10 minutes and once I dipped them in chocolate they got all melty.  Most of the first batch was a total mess.  Once they sat overnight though, they hardened up pretty well.  I did a second batch later, and I made the patties thicker and froze them for 30 minutes.  This time I also used chocolate chips, as stated in the recipe (the first time I used the nice Swiss melting chocolate I had).  I thought the dark chocolate from the first batch looked and tasted better (the one in the middle is from the first batch).  If you’re going to go to the trouble to make candy, you might as well use good stuff.  Lots of work though.  I think it would be easier next time, and I would consider doing it next year, maybe with BB (I did them alone, it was definitely too hard for a young child to help with), and I would buy peppermint extract for it. 

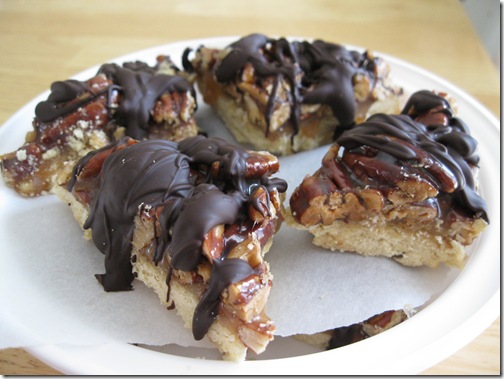
And finally, on that page there was a link to these chocolate dipped caramel pecan bars…drool!  It’s all my favorite things; how could I not make them?!?

IMG_3042

The verdict: these were about a thousand times harder and more time consuming than they looked.  I made the cookie crust; pretty straightforward.  Then I started the caramel, and the instructions were a little vague.  So if you think of doing this, let me advise you to google “how to make caramel” FIRST.  Alton Brown had some info, as did some other good sites.  It is fascinating, terrifying, and a miracle of calorie density.  I cooked 1 cup of corn syrup, 1 cup of sugar, 1/2 cup water and 1 cup of cream and I swear I got 1 cup of caramel.  Amazing; the laws of physics do not apply to making caramel!  No, really, you just get rid of all the water leaving only sugar and fat, it truly must be the most calorie dense thing I have ever made.  I question the need to start out with 1/2 cup of water and if I were crazy enough to try this again, I would look elsewhere for the caramel recipe.  So, when all was said and done, I went to cut the bars and they were STUCK in the pan like nothing you can imagine.  Most of them came out in pieces and only with patient chiseling did I get any out intact.  The caramel is not very firm, so it kind of oozed out as I tried to cut and extract them.  Needless to say, with a crumbling crust and an oozing top, I could not dip them in the chocolate because they just fell apart.  So I refrigerated them some more and drizzled the chocolate on top and refrigerated them again.  At room temperature I can say they are very messy.  My lucky children did get some of these in the end and it took awhile to get them unstickied. 

That’s my holiday kitchen adventures; later I will post more of our advent activities!


Quick teacher gift

1 07 2010

The past month has been a blur!  We came back from vacation, and all of a sudden, I realized it was the last week of preschool for BB!  I had wanted to make some nice teacher appreciation gifts, but it’s hard to do when you realize THE DAY BEFORE that school is almost over.  I had to make something with what we had in the house, and it had to be quick!  When I was a teacher I liked food gifts (this led me to make chocolate covered pretzels at Christmas time for BB’s teachers…that was a fiasco I did not want to repeat!), and I thought I would do something a little more original than cookies, so I made granola.  BB helped me make it, using our regular recipe with a few tweaks.  Because he is my little monkey, I called it “Little monkey Granola”, and included banana chips and other tropical things. 

Little Monkey Granola

  • 4 cups rolled oats
  • up to 3 cups nuts and other mix-ins
  • 1/3 cup oil
  • 1/2 cup honey
  • 1 teaspoon vanilla
  • 1/2 teaspoon coconut extract
  • 1 tablespoon cinnamon

Mix together oats and nuts (I used about 1 cup sunflower seeds and 1 cup cashews).  Then, mix the liquids: oil, honey, extracts, and cinnamon.  Spread in a large baking sheet lined with parchment paper and bake for 10 minutes at 300 F.  Take out and stir to keep the edges from getting overcooked—try to spread the middle stuff to the edges and the edge stuff to the middle.  After another 5 minutes, I pulled it out and added 1 cup of chopped banana chips and 1/2 cup coconut.  Put back in the oven for another 5-10 minutes.  That’s it!  If you smoosh it down with a spoon before it cools, you will get some bigger clumps. 

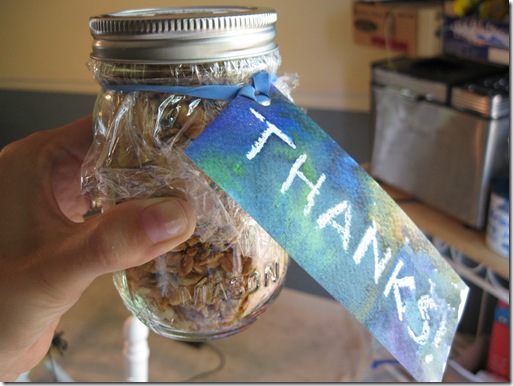
My next dilemma… how to package it?  I was going to make bags out of the cellophane I had from Christmas (from the pretzel debacle), but when I brought it out from storage it had DEAD SPIDERS in it!  Eeeeeeewwwwww!  So I raided my stash of canning jars, figuring that if I can barely get dinner on the table these days I will not be doing much canning this year.  Here’s the final result:

IMG_1901

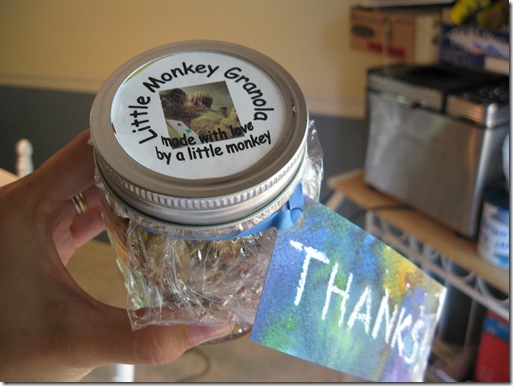
The tags were a simple watercolor resist, so that was a fun project with BB also.  I wrote “thanks!” on watercolor paper, over and over, because he has lots of teachers, in white crayon, then invited him to paint away with watercolors.  It was not the best gift anyone ever made, but it was do-able in the VERY short amount of time I had!  To top it off, I made a little label for the top so they would hopefully understand the banana granola a little better:

IMG_1902

Then we’ve been sick since school let out.  Fun!  I try to work on some projects, but it has been slow going.  I think we are all on the mend and hopefully have some more crafts to post in the not-too-too-distant future!


Awesome snack bars

7 05 2010

Ever since I saw this video, I have been sort of on a crusade to eat less sugar, and especially to reduce the sugary foods in BB’s diet.  I have always had a sweet tooth, and we would often make cookies or brownies to have on hand as a snack.  Making them was fun, and of course so was eating them, but I think it’s true to a certain extent that sugar is addictive and I don’t want my kids to grow up hooked on overly sweet foods.  Because once you cut back on sugar, you quickly realize that just about everything is overly sweet.  Granola bars that are more like candy bars, yogurt that is sweet enough to qualify as dessert, fruit snacks that are mostly sugar and sort of fruit flavored…the list could go on.  The most disturbing thing I have seen recently is a “yogurt” in the baby food aisle that had sugar as the second ingredient and was pasteurized after culturing, so all the good bacteria were killed anyway!  Now why do babies need sugary snacks too?

The video is a little bit long, so I will just summarize what I thought was the main point.  (Apparently this was on the news recently too, my parents tell me, so maybe it’s old news to you…)   Fructose and glucose are metabolized by completely different pathways.  Glucose is used by your muscles and brain as food, and excess can be stored in the liver as glycogen.  Consumption of glucose triggers a hormonal response that makes you feel full.  Fructose, on the other hand, is metabolized exclusively in the liver, and the majority of it is converted into fatty acids that are released into the bloodstream.  After eating a lot of fructose, he says, there is a measurable increase in your triglycerides.  This newly synthesized fat is then stored in fat cells around your body.  Also, fructose does NOT trigger the pathways that make you feel full.  In short, eating sugar will make you fat.  Now, sugar is 50/50 glucose and fructose.   High fructose corn syrup is 45/55 glucose and fructose, so it’s a little worse than sugar but not a whole lot.

That’s a long lead-in to my great snack bar discovery, but I feel pretty strongly about it.  Refined sugars are bad bad bad, and they are aggressively pushed on children.  (When was the last time you saw a cartoon pushing vegetables?  Now that I think about it, that would be great; Bugs bunny selling carrots, Spongebob on pineapples… Warner Bros. and Nick, if you take that idea, I want a cut!).  If you watch Jamie Oliver’s show at all you saw the children all drinking sugared milk (!!!); it made me want to cry.  If kids are used to eating less sugar they won’t expect everything to be so sweet.  BB will happily eat a bowl full of plain yogurt because that’s what we have.  Snack?  Fruit.  We just don’t have any cookies or fruit snacks or ice cream, so it’s not even an option.  Of course we have sweets occasionally, but they are not permanent residents on the shelves.

Going out is a little harder, because I like to carry snacks (no, I NEED to carry snacks; if you have a toddler you know this universal truth: never leave home without a snack.)  The trouble with processed food is that they hide sugar.  Like granola bars.  So, I’ve been trying to make snack bars for us and today I found snack nirvana.  These are knock-offs of Larabars, which I’ve never tried, but they must be good!  I found the recipe here and followed it more or less.

I guarantee: call them chocolate snack bars and children will eat them.

Chocolate Snack Bars (my slightly modified version using what I had on hand):

* 1 1/2 c. pitted dates

* 1/2 c. raisins

*2 T. cocoa powder (unsweetened)

* pinch of sea salt

Process the above ingredients in a food processor until they are a paste (it will kind of form a ball).  Transfer to mixing bowl.  Then, chop the following in the food processor (no need to clean it first):

* 1  c. pecans

* 1/2 c. almonds

* a sprinkle of shredded coconut (I used sweetened because it’s all I had, but unsweetened would be great)

The nuts should be ground up to be pretty small pieces.  Then add them to the bowl and mix the date puree with the nuts; it’s a stiff mixture and you will have to knead it to mix.  Finally, line a pan with plastic wrap and press the mixture in.  Refrigerate to set (about 30 min) and cut into bars.  Alternately I guess you could roll them into little balls, or something like that.  I’m trying to replace granola bars, so I wanted them to be bars.  The verdict?  They were AMAZING.  Sweet, chocolatey, nutty… everything you could want in a snack without a whiff of added sugar.  The challenge now is to not eat the whole batch!  They still have calories, after all!  I don’t, in general, like to use the food processor because it’s always too much work to get it set up and then cleaned, but overall I would say these are easier than making cookies or brownies, because you only dirty the processor and one bowl, as opposed to one or 2 bowls, spoons, and a cookie sheet or three.  They are more expensive to make than brownies, cookies, or granola bars, because they are not grain based, but they are cheaper than buying Larabars (or powerbars, etc.), so although they are not cheap, I consider them an all around winner on taste, effort, nutritional value and cost. The only thing I would do differently next time is make more!

PS.  I did not soak and dehydrate the nuts as indicated in the original recipe.  I do like to make snacks, but some things are just a little too much effort for the payoff, IMO.


Library score — Cook’s Illustrated!

20 04 2010

I was peacefully whiling away the morning while BB was in preschool last week, and I stopped by the library.  Outside, they have a shelf of books for sale, and to my utter delight, they had a stack of Cook’s Illustrated magazines too!  If you’re not familiar with this magazine, it’s like the print form of America’s Test Kitchen, my very favorite cooking show.  And if you’re not familiar with ATK, you probably have cable.  ATK is on PBS and I admit I didn’t watch it when I had cable because the Food Network was on 24 hours a day!  ATK reminds me a lot of Good Eats without the theatrics.  They test umpteen variations of a recipe and then show the one that worked the best.  They review kitchen equipment and taste test products.  It’s a super fun show.  I haven’t seen it in ages, so I was thrilled to find a stack of Cook’s Illustrated magazines for dirt cheap.  Yeah, they’re 6 years old, but you know what?  The lemon cake featured on their website RIGHT NOW is in one of my 6 year old magazines.  Good recipes are timeless!  I was so excited, I started with blueberry muffins.  If you know me, you know I like muffins.  A lot.

Of course, I only got to eat one of these, and no strawberries.

Here is a blog with the recipe (I did not dip mine in cinnamon sugar)…although apparently they came out with a “best” blueberry muffins recipe in 2009, so… I guess my recipe is old news.  Anyway, I thought they were delicious!  I may have to try the new one, but it calls for fresh blueberries, so I’ll just have to wait a few more months.

Next up, I decided to try the “Better, Easier, Spinach Lasagna”.  Easier than what, I don’t know!  Granted, the first time going through a recipe can often be a little slow, but seriously, this took 2 hours.  Apparently America’s Test Kitchen does not have 2 small children in it, because they would never have called this easy!  It was amazing though.  But I have already promised my husband I will never, ever, make it again.  Until maybe the kids are in college.  The recipe is out there, and just from reading, I should have known better (OK, can I say it’s a little hilarious I found it on Cooking Light?  This is heavy like a ton of bricks).  It’s only three steps!  Step 1: wash, trim, and cook the spinach, transfer to ice water, then to a towel to wring dry, then chop.  Step 2: Make a Bechamel sauce.  Step 3: Soak noodles in hot water, prepare cottage cheese mixture, assemble lasagna, bake, broil, then let cool.  Easy as pie, right?!?  I make lasagna pretty frequently, so I was all about trying an easier recipe.  Sadly this is not it.  It dirtied pretty much every pot, pan, bowl, knife, and kitchen appliance we own.  In the test kitchen I’m sure they have people who do the dishes, but not here!  My poor family was starving long before it was ready, and I defensively showed my husband, “Look, honey, it says right here it’s “easier”!”  It was easily the best spinach lasagna I’ve ever had, but it’s more of an “impress the boss” dinner than a “Monday night and everyone’s hungry” dinner.  The other taste testers: my husband said it was pretty good (that’s high praise), and BB declared it was DELICIOUS! but only ate about a bite of it.

I may never make you again, but I will see you in my dreams...

So that’s my latest kitchen adventure!  I am super excited to try more recipes from my new collection, though I doubt anyone else in the family is!


Pizza–Nature’s Most Perfect Food.

25 03 2010

I love pizza.  LOVE it.  If I could only eat one thing for the rest of my life, this would be it, without a doubt.  And, as with most things I like to eat in large quantities, I like to make it myself, for all the usual reasons.  It’s a HECKUVA lot cheaper than calling Papa John’s every week.  (Wait, calling?  What is this, 1995?  They have my credit card info and all my favorite orders saved on their website, and that’s dangerous.)  And it’s a million times better than frozen pizza.  It doesn’t take long to make, and it’s really kind of fun.  Tempted yet?

Yes, there is one plain slice, for the pickiest among us.

The Sauce:

Once upon a time, I found a recipe that claimed to be a Papa John’s copycat recipe, so I wrote it down, and have been using it, modified, ever since.  It makes enough for 4 pizzas, so I divvy it among little Tupperwares and freeze for future pizza nights.  Here goes:

  • 1 can crushed tomatoes (the big kind, 28 oz.)
  • 3 t. sugar
  • 1 t. salt
  • 1 t. oregano
  • 1 t. garlic powder
  • 1/2 t. basil
  • 1/2 t. thyme
  • 3 t. olive oil
  • 1 t. lemon juice

Just place everything in a small saucepan and simmer awhile.

The Crust:

Sometimes I do this in the bread machine, and I use the recipe from the booklet for that.  But, if we have time to kill, BB is always up for mixing things, so we’ll make it by hand.  It’s not so hard, especially with a little helper, and it’s fun because you get to get your hands dirty.  My recipe is ever-evolving, but here’s where it stands right now.  It makes just enough for our pizza pan, which I have no idea what size it is (14″?  15″?  something like that).

In a medium bowl, mix:

  • 1 c. warm water
  • 1 1/2 t. yeast
  • 1 T. sugar

Stir to dissolve the yeast and let sit to proof.  Then add:

  • 1 T. olive oil
  • 1 t. salt
  • 1 c. whole wheat flour

And mix well.  Then add in white flour, or bread flour if you have it till the dough is workable by hand (ie. not a sticky mess).  It’ll take about a cup.  Then, turn it out onto a floured surface and knead it, adding more flour as needed, until it is nice and elastic.  It should form a nice ball and spring back if you poke it.  I find it better to err on the side of too little flour, otherwise it gets stiff and hard to work with.  Coat the ball of dough with oil, cover with plastic wrap, and let it rise.  I usually pre-heat the oven a little since our house is pretty cold, and leave it there to rise.

Putting it all together:

Once the dough has doubled, and the sauce is ready, it’s time to make pizza!  I just stretch the dough to fit in my (oiled) pizza pan.  Spread about 1 c. sauce, and top however you like!  This pizza had spinach, roasted red peppers, and roasted garlic.  I have to say it was pretty amazing.  And, Papa John’s, as much as I love it, offers none of those fine toppings.

Mmmmmmm..... pizza.....

Bake at 400°F until the crust is browned and the cheese is melty and a little browned… then try to let it cool a bit and dig in!  It’s such a fun meal to have for dinner, and reasonably healthy, depending on what you put on it.  Now, I have read a lot about pizza.  And I have eaten a lot of pizza.  Let’s just say this is a well-researched topic here.  This will not be quite like those amazing specialty pizzas you get at those wood-fired oven places.  Apparently they get those awesome crusts by having an oven that cooks at 800°F!  Not an option for most home cooks.  Unless you are maybe Martha Stewart and you build a brick oven for that purpose, because you will NOT eat sub-par pizza.  But for the rest of us, a homemade pizza is easy, cheap, and pretty darn good.  I would eat it any day!  Or every day!